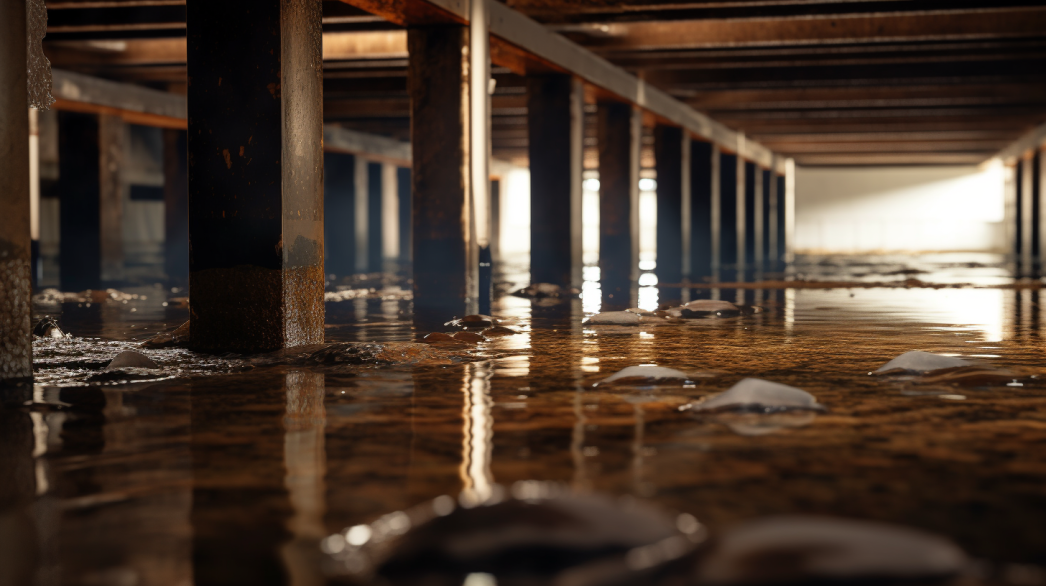
Bathrooms are one of the most moisture-prone areas in any home, making effective moisture control critical for maintaining both the functionality and aesthetics of the space. Excess moisture in bathrooms can lead to a host of problems, including mold growth, structural damage, and poor indoor air quality, which can impact the health and safety of occupants.
Moisture control in bathrooms is not merely a preventive measure; it is essential for preserving the integrity and longevity of the materials and fixtures used in this high-humidity environment. By implementing effective moisture management strategies, homeowners can prevent costly repairs and enhance the comfort and durability of their bathrooms.
In this blog post, we will explore the importance of moisture control in bathrooms, highlighting the risks of neglecting this crucial aspect and offering practical solutions to manage humidity effectively. From selecting the right materials and finishes to ensuring proper ventilation, we will cover the key elements necessary to keep your bathroom dry, safe, and aesthetically pleasing. By understanding the importance of moisture control, you can create a healthier and more resilient bathroom environment that stands the test of time.
Understanding Moisture Barriers
Moisture barriers are a fundamental component in construction, especially in moisture-rich environments like bathrooms. They play a crucial role in protecting against water damage, enhancing the durability of structures, and maintaining hygienic conditions.
What is a Moisture Barrier?
Definition and Purpose of Moisture Barriers
A moisture barrier, also known as a vapor barrier, is a protective layer designed to prevent the passage of moisture into building structures. Its primary purpose is to block water vapor and liquid water from infiltrating walls, floors, and ceilings, thereby protecting the integrity of the building materials and preventing moisture-related problems such as mold and rot.
Moisture barriers are essential in areas with high humidity or direct water exposure, such as bathrooms and kitchens. By keeping moisture out, these barriers help maintain a healthy indoor environment, reduce the risk of structural damage, and extend the lifespan of the building.
Common Materials Used
Moisture barriers come in various materials, each suited to different applications and conditions:
- Polyethylene Sheets: These are plastic sheets that provide a durable and flexible barrier against moisture. Polyethylene sheets are commonly used as underlayment for floors and walls, offering excellent moisture resistance at a relatively low cost. They are easy to install and are often used in combination with other moisture control measures for enhanced protection.
- Liquid-Applied Membranes: These are coatings applied in a liquid form that cure to create a seamless, monolithic barrier. Liquid-applied membranes are ideal for complex or irregular surfaces where traditional sheet barriers might be difficult to install. They provide excellent adhesion and flexibility, making them suitable for waterproofing applications in bathrooms and other wet areas.
Benefits of Moisture Barriers in Shower Areas
Prevention of Mold and Mildew Growth
One of the most significant benefits of moisture barriers in shower areas is their ability to prevent mold and mildew growth. Showers are constantly exposed to water and humidity, creating an ideal environment for mold and mildew to thrive. Moisture barriers effectively block moisture from seeping into the walls and floors, reducing the risk of mold development and the associated health hazards, such as allergies and respiratory issues.
Protection of Wall Structures from Water Damage
Moisture barriers protect the structural components of shower areas by preventing water intrusion:
- Preserving Structural Integrity: By keeping water out of the wall cavities and framing, moisture barriers help preserve the structural integrity of the bathroom. This prevents issues such as wood rot, which can weaken the structure and lead to costly repairs.
- Preventing Surface Damage: Moisture barriers also protect surface materials like tiles and grout from damage caused by water seepage. This helps maintain the appearance and functionality of the shower area over time.
Enhancement of Bathroom Durability and Hygiene
Installing moisture barriers enhances the overall durability and hygiene of the bathroom:
- Long-Lasting Materials: By protecting against moisture, barriers help ensure that bathroom materials and finishes last longer, reducing the need for frequent replacements and repairs.
- Improved Hygiene: A dry bathroom environment is more hygienic, as it reduces the likelihood of bacterial and fungal growth. Moisture barriers contribute to a cleaner, healthier bathroom space, promoting well-being for occupants.
In conclusion, moisture barriers are essential for maintaining the integrity, durability, and hygiene of shower areas. By understanding their purpose and benefits, homeowners and builders can make informed decisions to protect their bathrooms from moisture-related issues, ensuring a safe and comfortable environment for all.
Preparing for Installation
Proper preparation is crucial when installing moisture barriers in shower areas. Taking the time to assess the shower area and select the right barrier can ensure a successful installation that effectively protects against moisture-related issues.
Assessing the Shower Area
Identifying Potential Moisture Issues
Before installing a moisture barrier, it is essential to conduct a thorough assessment of the shower area to identify any existing or potential moisture issues:
- Check for Existing Damage: Look for signs of water damage such as discoloration, soft spots, or mold growth on walls, floors, and ceilings. These indicate that moisture has penetrated the existing materials and needs to be addressed before proceeding.
- Identify High-Risk Zones: Pay particular attention to areas prone to moisture accumulation, such as corners, seams, and edges around fixtures like faucets and showerheads. These areas often require additional protection to prevent future water intrusion.
- Evaluate Ventilation: Ensure that the shower area has adequate ventilation to prevent excessive humidity, which can contribute to moisture problems. Consider installing or upgrading exhaust fans if necessary.
Removing Old Materials and Preparing the Surface
Proper surface preparation is key to ensuring that the moisture barrier adheres correctly and functions effectively:
- Remove Old Materials: Carefully remove any existing tiles, drywall, or other materials that may have been damaged by moisture. This allows you to start with a clean slate and ensures that the new barrier will adhere properly.
- Clean and Repair the Surface: Thoroughly clean the surface to remove any dirt, dust, or debris. Repair any cracks, holes, or imperfections in the substrate to create a smooth, even surface for the moisture barrier.
- Dry the Area: Ensure that the shower area is completely dry before applying the barrier. Use fans or dehumidifiers to accelerate the drying process if necessary. A dry surface is critical for proper adhesion and performance of the moisture barrier.
Selecting the Right Moisture Barrier
Types of Barriers Suitable for Shower Walls
Choosing the right type of moisture barrier is essential for effective protection in shower areas. Several types of barriers are suitable for shower walls:
- Sheet Membranes: These are typically made from polyethylene or rubberized asphalt and provide a durable, flexible barrier that is ideal for use behind tiles and other wall coverings. Sheet membranes are popular due to their ease of installation and reliable performance.
- Liquid-Applied Membranes: These barriers are applied as a liquid and cure to form a seamless, waterproof layer. They are particularly useful for irregular surfaces and areas with multiple penetrations, as they can conform to any shape and provide a continuous barrier.
- Cementitious Coatings: These are cement-based products that are applied as a slurry to provide a water-resistant coating on shower walls. They are often used in conjunction with other moisture control measures for enhanced protection.
Considerations for Choosing the Appropriate Thickness and Material
When selecting a moisture barrier, consider the following factors to ensure optimal performance:
- Material Compatibility: Choose a barrier material that is compatible with the substrates and finishes in your shower area. This ensures proper adhesion and long-term durability.
- Barrier Thickness: The thickness of the barrier can impact its effectiveness. Thicker barriers generally provide better protection against moisture, but may be more challenging to install. Balance thickness with ease of application to meet your specific needs.
- Environmental Conditions: Consider the specific conditions of your shower area, such as exposure to water and humidity levels. Select a barrier that can withstand these conditions and provide reliable protection over time.
In conclusion, preparing for the installation of a moisture barrier in a shower area involves careful assessment of the space and selection of the appropriate materials. By following these steps, you can ensure a successful installation that effectively protects against moisture-related issues, enhancing the durability and hygiene of your bathroom.
Tools and Materials Needed
Installing a moisture barrier in a shower area requires specific tools and materials to ensure an effective and seamless installation. Using the right equipment helps protect your bathroom from moisture-related damage and ensures a successful project.
Essential Tools
Utility Knife
A utility knife is an indispensable tool for any moisture barrier installation project. It is used for cutting the barrier material to fit precisely around fixtures, corners, and edges. A sharp utility knife ensures clean cuts and minimizes material waste, allowing for a more efficient installation process.
Tape Measure
Accurate measurements are crucial for a successful installation. A tape measure helps you determine the exact dimensions of the areas where the moisture barrier will be installed. By taking precise measurements, you can cut the barrier material to fit perfectly, ensuring comprehensive coverage and optimal moisture protection.
Stapler or Adhesive Tape
Depending on the type of moisture barrier used, you may need a stapler or adhesive tape to secure the barrier in place. For sheet barriers, a construction stapler can be used to attach the material to the wall studs or other surfaces. Alternatively, adhesive tape specifically designed for moisture barriers can be used to ensure a secure fit without damaging the barrier material.
Safety Equipment (Gloves, Mask)
Safety should always be a priority during installation. Wearing gloves protects your hands from cuts and exposure to chemicals, while a mask helps prevent inhalation of dust and fumes from adhesives and barrier materials. Using the appropriate safety equipment ensures a safer working environment and reduces the risk of injury.
Required Materials
Moisture Barrier Material
Selecting the right moisture barrier material is crucial for effective moisture control in shower areas. The material you choose will depend on the specific needs of your shower and the surfaces being covered. Options include polyethylene sheets for underlayment, liquid-applied barriers for seamless coverage, and cementitious coatings for water-resistant finishes.
Sealing Tape or Adhesive
Sealing tape or adhesive is used to secure the moisture barrier material in place and ensure a watertight seal. For sheet barriers, use specialized sealing tape to join seams and edges, preventing moisture from penetrating through gaps. For liquid barriers, select an appropriate adhesive to enhance the bond between the barrier and the surface, ensuring lasting protection.
Cleaning Supplies (Broom, Vacuum)
Before installing a moisture barrier, it is essential to clean the surfaces thoroughly. Use a broom to sweep away loose debris and a vacuum to remove dust and dirt from floors and walls. A clean surface ensures better adhesion of the barrier material, preventing gaps and bubbles that could compromise moisture protection.
In conclusion, having the right tools and materials is critical for a successful moisture barrier installation. By using these essential tools and required materials, you can ensure that your shower area is adequately protected against moisture-related damage, contributing to a safe and long-lasting bathroom environment.
Tips and Tricks for Successful Installation
Installing a moisture barrier in a bathroom requires precision and attention to detail to ensure its effectiveness in protecting against water intrusion. By following these tips and tricks, you can achieve a successful installation that enhances the durability and functionality of your bathroom.
Ensuring a Proper Seal
Techniques for Sealing Seams and Edges Effectively
Creating a watertight seal around seams and edges is crucial for preventing moisture from penetrating the moisture barrier. Here are some techniques to ensure a proper seal:
- Overlap the Seams: When installing sheet barriers, overlap the seams by several inches to provide complete coverage and prevent gaps. This overlapping technique helps create a continuous barrier that blocks water infiltration.
- Use High-Quality Sealing Tape or Adhesive: Apply sealing tape or adhesive specifically designed for moisture barriers to secure seams and edges. Ensure the tape or adhesive is compatible with the barrier material and can withstand exposure to moisture and humidity.
- Press Firmly: After applying the tape or adhesive, press firmly along the seams and edges to ensure a tight seal. Use a roller or similar tool to apply even pressure, eliminating air bubbles and ensuring good adhesion.
Special Attention to Corners and Joints
Corners and joints are common weak points in moisture barrier installations, where leaks and moisture infiltration can occur. To ensure a proper seal in these areas:
- Pre-Cut Barrier Material: Pre-cut the barrier material to fit snugly into corners and around joints. This reduces the need for on-the-spot adjustments and ensures a more precise fit.
- Apply Extra Sealant: Use additional sealant or tape in corners and joints to reinforce the barrier. This extra layer of protection helps prevent moisture from finding its way through these critical areas.
- Check for Gaps: Inspect corners and joints for gaps or loose areas after installation. Address any issues immediately by applying more sealant or re-securing the material to ensure a continuous, watertight barrier.
Handling Complex Areas
Sealing Around Plumbing Fixtures and Pipes
Plumbing fixtures and pipes present unique challenges during moisture barrier installation. Proper sealing around these elements is essential to prevent leaks and water damage:
- Use Pre-Formed Collars: Consider using pre-formed collars designed for sealing around pipes and fixtures. These collars provide a snug fit and help create a reliable seal.
- Apply Sealant Generously: Use a generous amount of sealant around the base of fixtures and pipes, ensuring that all gaps are filled. Apply the sealant in layers, if necessary, to achieve a watertight seal.
- Check for Movement: Ensure that the barrier material allows for some movement around pipes and fixtures to accommodate expansion and contraction without breaking the seal.
Working with Awkward Spaces and Shapes
Bathrooms often contain awkward spaces and shapes that can make moisture barrier installation challenging. To work effectively in these areas:
- Cut Barrier Material to Fit: Carefully measure and cut the barrier material to fit around irregular shapes and awkward spaces. This minimizes gaps and ensures full coverage.
- Use Flexible Barriers: Consider using flexible, liquid-applied barriers that can conform to any shape. These barriers provide a seamless, monolithic layer that is ideal for complex surfaces.
- Be Patient and Precise: Take your time when working in awkward spaces. Carefully adjust the material to ensure it fits snugly and securely, using sealant to fill any remaining gaps.
In conclusion, successful moisture barrier installation requires careful attention to detail and the right techniques to ensure a proper seal and effective coverage. By focusing on seams, edges, and complex areas, you can enhance the durability and performance of your moisture barrier, protecting your bathroom from moisture-related issues for years to come.
Best Practices for Installation
Proper installation of moisture barriers is crucial for maximizing their effectiveness in protecting buildings from moisture-related damage and enhancing energy efficiency. By following best practices, homeowners and contractors can ensure that moisture barriers perform optimally and provide long-lasting protection.
Preparing for Installation
Assessing Areas for Potential Moisture Issues
Before beginning the installation of a moisture barrier, it is essential to conduct a thorough assessment of the areas where the barrier will be installed. This involves identifying potential sources of moisture and areas prone to water intrusion:
- Identify High-Risk Zones: Focus on areas that are naturally susceptible to moisture, such as basements, crawl spaces, bathrooms, kitchens, roofs, and attics. Look for signs of existing moisture issues, such as water stains, mold, or musty odors.
- Evaluate Structural Conditions: Check the structural integrity of the surfaces where the barrier will be applied. Ensure that walls, floors, and ceilings are free from cracks, holes, or damage that could compromise the barrier's effectiveness.
Ensuring Proper Surface Preparation
Surface preparation is critical to ensuring that the moisture barrier adheres correctly and functions as intended:
- Clean the Surface: Remove any dirt, dust, grease, or debris from the installation area. A clean surface allows for better adhesion and minimizes the risk of gaps or bubbles forming under the barrier.
- Dry the Surface: Ensure that all surfaces are completely dry before applying the barrier. Moisture or residue left on surfaces can interfere with the adhesive properties of the barrier material.
- Repair Any Damage: Address any existing damage to the surfaces, such as cracks or holes, before installing the barrier. Use appropriate repair materials to create a smooth, stable surface for application.
Installation Techniques
Ensuring a Proper Seal Around Seams and Edges
Creating a watertight seal around seams and edges is essential for preventing moisture infiltration:
- Overlap Seams: When applying sheet barriers, overlap the seams by several inches to ensure complete coverage and prevent moisture from penetrating through gaps.
- Use Sealant or Tape: Apply sealing tape or adhesive specifically designed for moisture barriers to secure seams and edges. This ensures a tight seal and enhances the barrier's effectiveness.
- Check for Continuity: Inspect the barrier during and after installation to confirm that there are no gaps or loose areas, particularly around seams and edges.
Tips for Handling Complex Areas (e.g., Corners, Penetrations)
Complex areas, such as corners, penetrations, and irregular surfaces, require special attention during installation:
- Cut Precise Shapes: When installing barriers around corners or penetrations, cut the material to fit snugly around these areas. Precision cutting helps minimize gaps and ensures a tight fit.
- Use Flexible Materials: For irregular surfaces, consider using liquid-applied or roll-on barriers that can conform to the shape of the surface, providing seamless coverage.
- Apply Additional Sealant: In challenging areas, apply extra sealant or tape to reinforce the barrier and prevent moisture from seeping through.
Professional vs. DIY Installation
Pros and Cons of Professional Installation
Hiring a professional to install moisture barriers offers several advantages:
- Pros:
- Expertise: Professionals have experience and knowledge of the best practices for moisture barrier installation, ensuring a high-quality job.
- Efficiency: A professional installation is often faster and more efficient, minimizing disruptions to your home or business.
- Warranty: Many professional services offer warranties on their work, providing peace of mind and protection against future issues.
- Cons:
- Cost: Professional installation can be more expensive than a DIY approach.
- Scheduling: You may need to accommodate the contractor's schedule, which can be less flexible than doing it yourself.
Guidelines for Successful DIY Installation
For those considering a DIY approach, following these guidelines can help ensure a successful installation:
- Research and Plan: Familiarize yourself with the materials and techniques required for the installation. Develop a clear plan and gather all necessary tools and materials before starting.
- Follow Manufacturer Instructions: Adhere to the manufacturer's guidelines and recommendations for applying the moisture barrier. This ensures compatibility and optimal performance.
- Take Your Time: Allow sufficient time for the installation process, and do not rush. Pay attention to detail, especially when sealing seams and handling complex areas.
- Inspect Your Work: Once installation is complete, conduct a thorough inspection to ensure the barrier is properly sealed and free from defects.
In conclusion, whether you choose professional or DIY installation, following best practices for moisture barrier installation is crucial for maximizing their effectiveness. Proper preparation, precise application, and attention to detail ensure that your building remains protected from moisture-related issues, enhancing its durability and energy efficiency.
FAQs
-
What materials are needed for installation?
You'll need a moisture barrier material (like polyethylene sheets or liquid-applied membrane), sealing tape or adhesive, a utility knife, a tape measure, a stapler or adhesive tape, and safety equipment such as gloves and a mask.
-
How do I prepare the surface?
Begin by removing old materials and cleaning the surface thoroughly to remove dust and debris. Ensure the area is completely dry, and repair any damage such as cracks or holes to create a smooth, even surface for the barrier.
-
How to ensure a proper seal?
Overlap seams by several inches and use high-quality sealing tape or adhesive to secure them. Pay special attention to corners and edges, and apply extra sealant to ensure a watertight seal.
-
How to handle plumbing penetrations?
Use pre-formed collars or apply a generous amount of sealant around pipes and fixtures. Ensure that the barrier allows for slight movement to accommodate expansion and contraction without breaking the seal.
-
DIY or professional installation?
DIY installation is possible with the right tools and preparation. However, professional installation ensures expertise, efficiency, and often comes with a warranty, which can be beneficial for complex or large-scale projects.
Contact Bull City Crawlspace Today!
Bull City Crawlspace will do everything we can to ensure your experience with us is excellent.
Request A FREE Estimate
Request a Free Estimate Form
We will get back to you as soon as possible.
Please try again later.
Checkout Recent Post
Got a Question? We’re Here to Help.
You can arrange an appointment or make an enquiry by phone or email, orget in touch to us via our contact form.
Business Hours:
Monday - Friday 8:00 AM - 8:00 PM Saturday and Sunday: Closed
We're your local family owned, operated and licensed crawl space repair and waterproofing company.
919-724-4601
jon@bullcitycrawlspace.com
Services
NATIONWIDE LEADER
Claim you free crawl space consultation today by clicking the button below.
Contact Info
Business Hours:
Mon to Fri: 8:00am - 8:00pm
All Rights Reserved | Bull City Crawlspace

