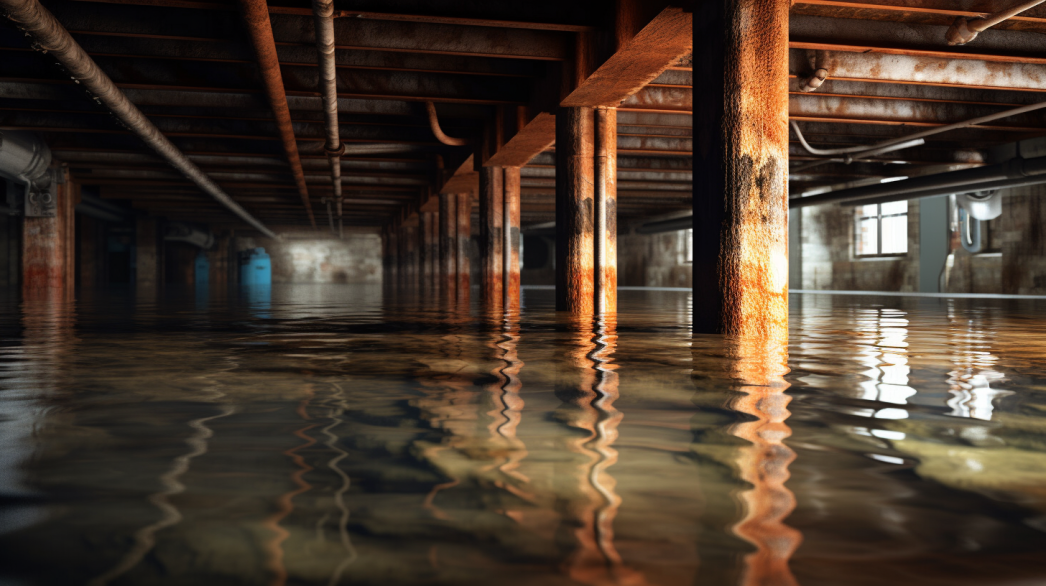
Moisture barriers play a vital role in protecting homes and buildings from the damaging effects of water infiltration. These barriers are designed to prevent moisture from penetrating walls, floors, and ceilings, safeguarding the structural integrity and indoor air quality of a space. However, like any component of a building, moisture barriers require regular maintenance to remain effective over time.
Proper maintenance of moisture barriers is essential to ensure they continue to function as intended. Without routine inspection and upkeep, moisture barriers can develop weaknesses that lead to leaks, mold growth, and structural damage. Such issues can compromise the safety and comfort of a home, resulting in costly repairs and health risks for occupants.
This blog post will explore the
importance of maintaining moisture barriers and provide practical tips for ensuring their longevity and performance. We will discuss common signs of wear and tear, preventive measures to extend the life of your moisture barriers, and the benefits of proactive maintenance. By the end of this article, you will understand how regular maintenance can help protect your investment and keep your home safe and dry.
Understanding Moisture Barriers
Moisture barriers are a crucial component in modern construction, playing a vital role in protecting buildings from the adverse effects of water intrusion. Understanding what moisture barriers are and where they are applied can help ensure that they are used effectively to safeguard structural integrity and improve the longevity of building materials.
What is a Moisture Barrier?
Definition and Primary Function
A moisture barrier, also known as a vapor barrier, is a layer of material designed to prevent moisture from passing through surfaces like walls, floors, and ceilings. Its primary function is to protect building materials and structural components from the damaging effects of water and humidity. By blocking moisture intrusion, moisture barriers help prevent issues such as mold growth, wood rot, and the deterioration of building materials, which can compromise both structural integrity and indoor air quality.
Moisture barriers are particularly important in areas prone to high humidity or water exposure, where they act as a defense against moisture-related problems. Their effectiveness lies in their ability to create an impermeable or semi-permeable layer that controls the movement of water vapor and liquid water, ensuring that moisture does not penetrate into critical areas of a building.
Common Materials and Types of Moisture Barriers
Moisture barriers come in various materials and forms, each suited to specific applications and environmental conditions:
- Polyethylene Sheets: These are plastic sheets that provide a strong and flexible moisture barrier, commonly used as underlayments in flooring installations or as lining in crawl spaces and basements.
- Liquid-Applied Barriers: These are coatings that are applied as a liquid and dry to form a seamless, continuous barrier. They are ideal for complex or irregular surfaces where traditional sheet barriers might be challenging to install.
- Roll-On or Paint-On Barriers: These barriers are applied with a roller or brush, offering a convenient solution for surfaces requiring quick and easy protection. They are often used in residential applications where fast-drying properties are beneficial.
- Foil and Metalized Film: These are reflective barriers used to prevent moisture and also help in insulation by reflecting radiant heat. They are suitable for roofs and walls where temperature control is also desired.
Each type of moisture barrier offers unique advantages, and selecting the right one depends on factors such as the specific application, the level of exposure to moisture, and the type of surface being protected.
Areas of Application
Typical Areas Where Moisture Barriers are Used
Moisture barriers are essential in various parts of a building, particularly in areas where moisture is most likely to pose a threat:
- Basements: Basements are susceptible to water seepage and high humidity levels. Moisture barriers are used on walls and floors to prevent groundwater intrusion and condensation, protecting the foundation from moisture damage.
- Bathrooms: Bathrooms experience constant water exposure from showers, tubs, and sinks. Moisture barriers in bathrooms are crucial for protecting walls, floors, and ceilings from water penetration, which can lead to mold and structural damage.
- Roofs: Roofing systems benefit from moisture barriers that prevent rainwater and humidity from entering the building envelope. These barriers are often installed beneath shingles or roofing materials to provide an additional layer of protection against leaks.
- Crawl Spaces: Crawl spaces can trap moisture from the ground, leading to dampness and mold growth. Installing moisture barriers helps keep these spaces dry and prevents moisture from affecting the floor structures above.
- Exterior Walls: In areas with high rainfall or humidity, moisture barriers in exterior walls help block water vapor from entering the building, preserving the integrity of insulation and preventing moisture-related issues.
By understanding the different types of moisture barriers and their applications, builders and homeowners can effectively protect their properties from moisture damage, ensuring a safe and durable environment.
Why Maintenance and Inspection are Essential
Moisture barriers are vital components in any building, designed to protect against water intrusion and its damaging effects. However, to ensure that these barriers perform effectively over time, regular maintenance and inspection are crucial. By prioritizing these activities, property owners can prevent costly repairs and extend the lifespan of their moisture barriers.
Preventing Damage
Avoiding Mold and Mildew Growth
One of the primary reasons for maintaining and inspecting moisture barriers is to prevent the growth of mold and mildew. These fungi thrive in damp environments and can spread rapidly, posing significant health risks such as allergies, respiratory issues, and other illnesses. Regular inspection of moisture barriers helps identify any weaknesses or breaches that might allow moisture to penetrate and create conditions conducive to mold growth.
Early detection and repair of these vulnerabilities prevent mold infestations and maintain a healthy indoor environment. By ensuring that moisture barriers remain intact and functional, property owners can avoid the costly and time-consuming process of mold remediation.
Protecting Structural Elements from Moisture-Related Damage
Moisture can compromise the structural integrity of a building if it penetrates critical components such as walls, floors, and foundations. Over time, water exposure can lead to wood rot, corrosion of metal elements, and the deterioration of insulation and other building materials. Regular maintenance and inspection of moisture barriers help protect these structural elements by ensuring that the barriers are effectively preventing moisture intrusion.
Inspecting moisture barriers for signs of wear, tear, or damage allows for timely repairs and replacements, reducing the risk of significant structural damage. By maintaining these protective layers, property owners can preserve the strength and stability of their buildings.
Prolonging Barrier Lifespan
Ensuring the Effectiveness of the Moisture Barrier Over Time
The effectiveness of a moisture barrier depends on its condition and ability to repel water consistently. Over time, exposure to environmental factors, such as temperature fluctuations, UV radiation, and physical wear, can degrade the barrier material. Regular maintenance involves checking for signs of degradation and ensuring that the barrier continues to function as intended.
Maintenance activities might include resealing seams, repairing punctures or tears, and reinforcing areas with additional material. By proactively addressing these issues, property owners can ensure that their moisture barriers remain effective and reliable for many years.
Identifying Potential Issues Early
Early identification of potential issues is a key benefit of regular moisture barrier inspection and maintenance. By routinely inspecting barriers, property owners can detect small problems before they escalate into significant issues that require extensive repairs.
Common issues to look for during inspections include:
- Cracks or Holes: Small openings can allow moisture to seep through, compromising the barrier’s integrity.
- Peeling or Delamination: Separation of barrier layers can reduce its effectiveness.
- Signs of Moisture Penetration: Stains, discoloration, or damp spots on walls and floors indicate that the barrier may not be functioning properly.
Addressing these issues promptly helps maintain the barrier’s protective capabilities and avoids larger, more costly repairs in the future.
In conclusion, regular maintenance and inspection of moisture barriers are essential for preventing damage and prolonging their lifespan. By keeping these barriers in optimal condition, property owners can ensure effective protection against moisture intrusion, safeguarding the structural integrity and health of their buildings.
Tools and Equipment Needed for Inspection
Inspecting moisture barriers regularly is essential to ensure they are functioning effectively and protecting your building from moisture-related damage. Using the right tools and equipment during inspections can help you identify potential issues early and maintain the integrity of your moisture barriers.
Basic Tools
Flashlight
A flashlight is an essential tool for inspecting moisture barriers, especially in dimly lit or hard-to-reach areas. A bright flashlight helps you see details clearly, allowing you to identify signs of wear, damage, or moisture infiltration. Use a flashlight to examine seams, corners, and other areas where barriers might be compromised, ensuring a thorough inspection.
Moisture Meter
A moisture meter is a crucial tool for measuring the moisture content in building materials and detecting hidden moisture problems. These meters can help you identify areas where moisture may be penetrating the barrier and accumulating within walls, floors, or ceilings.
There are two main types of moisture meters:
- Pin-Type Meters: These meters use probes to measure electrical resistance within materials, which decreases as moisture content increases.
- Pinless Meters: These devices use electromagnetic sensors to detect moisture levels without penetrating the surface, making them ideal for non-invasive testing.
Regular use of a moisture meter during inspections helps ensure that your moisture barriers are effectively preventing water intrusion.
Infrared Thermometer
An infrared thermometer is used to detect temperature variations on surfaces, which can indicate moisture problems. Moist areas often have different thermal properties than dry areas, and an infrared thermometer can help identify these temperature discrepancies. By scanning walls, floors, and ceilings, you can locate potential moisture issues without invasive testing, allowing for targeted repairs.
Additional Equipment
Protective Gear (Gloves, Mask)
When inspecting and maintaining moisture barriers, it is important to wear protective gear to safeguard your health. Gloves protect your hands from potential irritants and contaminants, while a mask prevents inhalation of dust, mold spores, or chemicals. Wearing protective gear ensures a safe working environment, especially when dealing with existing mold or when applying repair materials.
Repair Kits for Minor Damages
Having a repair kit on hand is useful for addressing minor damages during inspections. These kits typically include materials and tools for patching holes, sealing seams, and reinforcing weak areas of the moisture barrier. By performing timely repairs, you can prevent small issues from developing into larger problems that compromise the effectiveness of the barrier.
Repair kits may include:
- Sealant or Adhesive: For sealing small holes or reinforcing seams.
- Patching Material: To cover larger damaged areas.
- Application Tools: Such as brushes or rollers for applying sealants and patches.
By using the appropriate tools and equipment during inspections, you can effectively identify and address issues with your moisture barriers. Regular inspection and maintenance help ensure that these barriers continue to protect your building from moisture-related damage, preserving the structural integrity and indoor air quality of your space.
Steps for Inspecting Your Moisture Barrier
Regular inspection of your moisture barrier is essential to ensure its effectiveness in protecting your home from water damage. A systematic approach to inspection helps identify potential issues early, preventing costly repairs and maintaining a safe environment.
Preparing for Inspection
Identifying High-Risk Areas Prone to Moisture Intrusion
Before beginning the inspection, it is crucial to identify high-risk areas that are more susceptible to moisture intrusion. These areas typically include:
- Bathrooms and Kitchens: Due to frequent water use, these areas are prone to leaks and condensation.
- Basements and Crawl Spaces: These spaces often have higher humidity levels and are at risk of water seepage from the ground.
- Roof and Attic: Exposure to external weather conditions makes these areas susceptible to leaks and water damage.
Focusing on these high-risk areas ensures a thorough inspection and helps prioritize areas that may require immediate attention.
Ensuring Safety Measures Are in Place
Safety is paramount when inspecting moisture barriers. Before starting, ensure you have the appropriate protective gear, such as gloves and a mask, to protect against mold spores, dust, and other irritants. Additionally, make sure the area is well-ventilated and that you have proper lighting, especially in confined or dimly lit spaces. Having a first-aid kit nearby is also advisable in case of any minor injuries during the inspection.
Conducting a Thorough Inspection
Visual Inspection for Signs of Wear and Tear
Begin the inspection with a visual examination of the moisture barrier. Look for any obvious signs of wear and tear, such as:
- Cracks or Holes: These can allow moisture to penetrate the barrier and should be repaired immediately.
- Peeling or Delamination: Separation of the barrier from the surface indicates a loss of adhesion, compromising its effectiveness.
- Discoloration: Changes in color may signal water damage or degradation of the material.
Pay close attention to the barrier’s surface and any irregularities that might indicate underlying problems.
Using a Moisture Meter to Detect Hidden Moisture
After the visual inspection, use a moisture meter to check for hidden moisture within the walls, floors, and ceilings. Moisture meters can detect areas with elevated moisture levels that are not visible to the naked eye. Take readings at various points, particularly in high-risk areas, to ensure comprehensive coverage.
If the moisture meter indicates high moisture levels, further investigation may be necessary to determine the source and extent of the moisture intrusion.
Checking Seams, Edges, and Joints for Gaps or Peeling
Seams, edges, and joints are common points of failure in moisture barriers. Inspect these areas closely for any signs of gaps or peeling, which can allow moisture to penetrate and cause damage. Use sealing tape or adhesive to repair any issues found, ensuring that the barrier remains continuous and watertight.
Identifying Problem Areas
Signs of Mold, Mildew, or Dampness
During the inspection, be vigilant for signs of mold, mildew, or dampness. These can manifest as:
- Musty Odors: A damp or musty smell often indicates the presence of mold or mildew.
- Visible Mold Growth: Black, green, or white spots on surfaces are signs of mold.
- Damp Patches: Areas that feel damp to the touch may indicate a breach in the barrier.
If you encounter these signs, it is essential to address the underlying moisture issue promptly to prevent further damage.
Discoloration or Damage to the Barrier Material
Discoloration or damage to the moisture barrier material can indicate exposure to moisture or environmental stressors. Inspect the barrier for any changes in appearance, such as fading or brittleness, which may signal that the material is no longer effective. If significant damage is found, replacing the affected section of the barrier may be necessary to restore its protective capabilities.
In conclusion, a thorough inspection of your moisture barrier involves careful preparation, detailed examination, and prompt identification of problem areas. By following these steps, you can ensure that your moisture barrier remains effective in protecting your home from moisture-related damage, preserving its structural integrity and indoor air quality.
Tips for Maintaining Your Moisture Barrier
Regular maintenance of your moisture barrier is essential to ensure it remains effective in protecting your home from moisture-related damage. By following these maintenance tips, you can extend the life of your moisture barrier and prevent costly repairs.
Regular Cleaning and Upkeep
Keeping the Barrier Surface Clean and Free of Debris
Regular cleaning is crucial to maintaining the effectiveness of your moisture barrier. Debris, dirt, and dust can accumulate on the surface over time, potentially compromising its protective properties. Use a soft brush or cloth to gently remove any loose particles from the barrier surface. For tougher grime, a mild detergent solution can be used, but be sure to rinse thoroughly to avoid leaving any residue that could degrade the material.
Consistent cleaning helps preserve the integrity of the barrier material, ensuring that it continues to provide a reliable defense against moisture intrusion.
Ensuring Proper Ventilation in Enclosed Areas
Proper ventilation is key to preventing moisture buildup in enclosed areas, such as basements and crawl spaces. Good airflow helps reduce humidity levels, minimizing the risk of condensation and mold growth. Consider installing exhaust fans, vents, or dehumidifiers in areas where moisture accumulation is a concern. Regularly check and clean these ventilation systems to ensure they are functioning effectively.
By maintaining adequate ventilation, you can reduce the strain on your moisture barrier and enhance its longevity.
Repairing Minor Damage
Techniques for Patching Small Tears or Holes
Over time, minor damage such as small tears or holes can occur in your moisture barrier. Addressing these issues promptly is essential to prevent them from worsening and allowing moisture to penetrate the barrier. For small tears or holes, use a patching kit designed for your specific barrier material. These kits typically include a patch and adhesive that can be applied over the damaged area.
To patch a small tear or hole:
- Clean the Area: Remove any dirt or debris around the damaged area to ensure proper adhesion.
- Apply the Patch: Cut a patch slightly larger than the tear, apply adhesive, and press firmly over the damage.
- Seal the Edges: Use additional adhesive to seal the edges of the patch, ensuring a watertight seal.
Sealing Gaps with Appropriate Adhesive or Tape
Gaps or seams in the moisture barrier can develop over time, potentially compromising its effectiveness. Use an appropriate adhesive or sealing tape to close these gaps and maintain a continuous barrier. Choose products specifically designed for moisture barriers to ensure compatibility and effectiveness.
To seal gaps:
- Clean the Surface: Ensure the area around the gap is clean and dry.
- Apply Adhesive or Tape: Follow the manufacturer's instructions to apply the adhesive or tape over the gap.
- Press Firmly: Ensure a tight seal by pressing the adhesive or tape firmly into place.
When to Seek Professional Help
Identifying Issues That Require Expert Attention
While minor repairs can be handled independently, some issues may require the expertise of a professional. Signs that professional help is needed include:
- Extensive Damage: Large areas of the barrier are damaged or degraded.
- Persistent Moisture Problems: Ongoing issues with moisture infiltration despite previous repairs.
- Complex Repairs: Damage in hard-to-reach areas or involving multiple layers of the barrier system.
Professionals have the tools and expertise to address these challenges effectively, ensuring that your moisture barrier is fully restored.
Benefits of Professional Maintenance Services
Hiring a professional maintenance service offers several benefits, including:
- Expertise: Professionals have experience dealing with various types of moisture barriers and can provide tailored solutions.
- Thorough Inspection: A professional can conduct a comprehensive inspection to identify underlying issues that may not be immediately apparent.
- Long-Term Solutions: Professionals can implement long-lasting repairs and maintenance strategies, saving you time and money in the long run.
In conclusion, regular maintenance and timely repairs are essential for preserving the effectiveness of your moisture barrier. By following these tips and knowing when to seek professional assistance, you can ensure that your moisture barrier continues to protect your home from moisture-related damage.
FAQs
-
How often should I inspect barriers?
Inspect moisture barriers at least twice a year to ensure they are intact and functioning effectively. Regular inspections help identify and address issues before they become major problems.
-
What signs indicate barrier damage?
Signs of barrier damage include visible tears, holes, peeling, discoloration, and any musty odors. These indicate potential breaches that could allow moisture intrusion.
-
How do I repair small barrier tears?
For small tears, clean the area, apply a suitable patch or tape, and press firmly to ensure a tight seal. Use products designed for your specific barrier material.
-
When should I call a professional?
Call a professional if you notice extensive damage, persistent moisture problems, or issues in difficult-to-reach areas. Professionals can provide comprehensive solutions.
-
Why is cleaning the barrier important?
Cleaning the barrier removes debris and dust that can degrade the material and compromise its effectiveness. Regular cleaning helps maintain its protective properties.
Contact Bull City Crawlspace Today!
Bull City Crawlspace will do everything we can to ensure your experience with us is excellent.
Request A FREE Estimate
Request a Free Estimate Form
We will get back to you as soon as possible.
Please try again later.
Checkout Recent Post
Got a Question? We’re Here to Help.
You can arrange an appointment or make an enquiry by phone or email, orget in touch to us via our contact form.
Business Hours:
Monday - Friday 8:00 AM - 8:00 PM Saturday and Sunday: Closed
We're your local family owned, operated and licensed crawl space repair and waterproofing company.
919-724-4601
jon@bullcitycrawlspace.com
Services
NATIONWIDE LEADER
Claim you free crawl space consultation today by clicking the button below.
Contact Info
Business Hours:
Mon to Fri: 8:00am - 8:00pm
All Rights Reserved | Bull City Crawlspace

