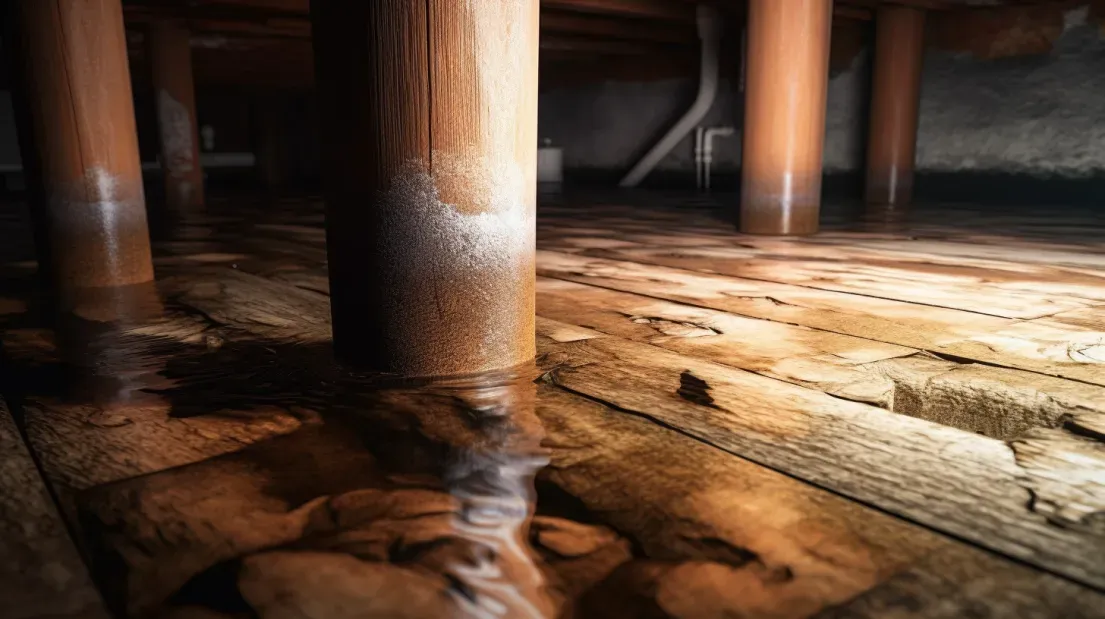
Water damage is one of the most significant threats to the longevity and integrity of buildings. The intrusion of moisture can lead to a range of issues, from cosmetic blemishes to severe structural problems. Implementing effective moisture barriers is crucial in safeguarding structures against these threats. Moisture barriers act as a critical line of defense, preventing water from penetrating building materials and causing deterioration.
Effective moisture barriers help to maintain the structural integrity of buildings by blocking water ingress that can lead to material degradation. For example, continuous exposure to moisture can weaken concrete, wood, and steel, making them susceptible to cracks, rot, and corrosion. By keeping these materials dry, moisture barriers prolong their lifespan and reduce the need for frequent repairs.
In addition to structural protection, moisture barriers also play a vital role in preserving indoor air quality. Basements and other below-grade spaces are particularly prone to dampness and mold growth, which can spread spores throughout the building and pose health risks to occupants. By preventing moisture from entering these areas, moisture barriers help to create a healthier living environment.
Adhering to the established guidelines and principles for moisture barrier installation and maintenance is essential for ensuring their effectiveness. This involves selecting the appropriate materials based on the specific environmental conditions, following proper installation techniques, and conducting regular inspections and maintenance. By doing so, property owners can protect their investments and ensure that their buildings remain safe, dry, and structurally sound for years to come.
Understanding the role of moisture barriers in protecting structures from water damage highlights their importance in construction and maintenance practices. By implementing these barriers effectively, we can mitigate the risks associated with water damage and enhance the durability and health of our built environments.
Understanding Moisture Barriers
What is a Moisture Barrier?
Definition and Types A moisture barrier is a material specifically designed to prevent water and moisture from penetrating into building structures, particularly basements and other below-grade areas. There are various types of moisture barriers, including vapor barriers, which restrict water vapor movement, and waterproofing membranes, which prevent liquid water from seeping through.
Common Materials Used Moisture barriers are made from a variety of materials, each chosen for their specific properties and effectiveness in different environments. Common materials include:
- Polyethylene: Known for its durability and impermeability, polyethylene sheeting is widely used due to its cost-effectiveness and ease of installation.
- Rubber: Used in sheet membranes, rubber provides flexibility and strong water resistance, making it ideal for areas prone to movement or settling.
- Asphalt: Often used in sheet membranes, asphalt provides excellent adhesion and water resistance.
- Acrylic and Polyurethane: Used in liquid membranes, these materials offer seamless application and robust protection against moisture ingress.
Importance of Maintenance
Preventing Degradation and Failure Regular maintenance is essential to prevent the degradation and failure of moisture barriers. Over time, barriers can suffer from physical damage, chemical exposure, and environmental wear and tear. By conducting regular inspections and addressing minor issues promptly, the integrity of the moisture barrier can be preserved, ensuring continued protection against moisture.
Extending the Lifespan of the Barrier Maintenance practices such as cleaning, repairing small tears, and reapplying protective coatings can significantly extend the lifespan of moisture barriers. These practices help to maintain their effectiveness, reduce the need for costly replacements, and ensure the long-term health and safety of the building.
Common Issues with Moisture Barriers
Physical Damage
Causes of Tears and Punctures Physical damage to moisture barriers can occur due to various factors, including construction activities, sharp objects, and settling of the building foundation. Tears and punctures compromise the barrier's effectiveness, allowing moisture to penetrate and potentially cause damage to the building structure.
Impact on Barrier Effectiveness Even small tears and punctures can lead to significant issues, as they create entry points for water and moisture. This can result in mold growth, structural damage, and deterioration of indoor air quality. Prompt repair of any physical damage is crucial to maintaining the barrier's protective function.
Chemical Degradation
Effects of Exposure to Chemicals and UV Radiation Exposure to chemicals and UV radiation can cause chemical degradation of moisture barriers. Chemicals from soil, groundwater, or construction materials can react with the barrier material, weakening it and reducing its effectiveness. UV radiation can also cause materials like polyethylene to become brittle and crack over time.
Identifying Signs of Chemical Damage Signs of chemical damage include discoloration, brittleness, and cracking of the barrier material. Regular inspection and prompt replacement of damaged sections are necessary to prevent further degradation and ensure continued protection.
Environmental Wear and Tear
Effects of Temperature Fluctuations and Moisture Exposure Environmental factors such as temperature fluctuations and constant moisture exposure can also impact the integrity of moisture barriers. Expansion and contraction due to temperature changes can cause cracks and separation in the barrier material. Continuous exposure to moisture can lead to saturation and eventual breakdown of the barrier.
Long-Term Impacts on Barrier Integrity Long-term exposure to these environmental factors can significantly reduce the lifespan and effectiveness of moisture barriers. Implementing protective measures such as additional insulation and ensuring proper drainage can help mitigate these effects and maintain the barrier's integrity over time.
By understanding the importance of maintenance and being aware of common issues that can affect moisture barriers, property owners and builders can take proactive steps to ensure the longevity and effectiveness of these critical protective systems.
Inspecting Your Moisture Barrier
Regular Inspection Routine
Frequency of Inspections Regular inspections are crucial for maintaining the effectiveness of moisture barriers. It is recommended to inspect moisture barriers at least twice a year, ideally in the spring and fall. Additionally, inspections should be conducted after severe weather events, such as heavy rainfall or extreme temperature changes, to identify any damage that may have occurred.
Key Areas to Check for Damage When inspecting moisture barriers, focus on key areas that are most susceptible to damage. These include:
- Seams and Joints: Check for any signs of separation or failure in the seams and joints, as these are common entry points for moisture.
- Corners and Edges: Inspect corners and edges where materials may have shifted or become loose.
- Penetrations: Examine areas around pipes, conduits, and other penetrations for signs of leaks or gaps.
- Surface Conditions: Look for visible signs of damage such as cracks, blisters, or discoloration on the barrier surface.
Tools and Techniques for Inspection
Visual Inspection Tools Visual inspections are the first line of defense in identifying potential issues with moisture barriers. Useful tools for visual inspections include:
- Flashlights: Essential for illuminating dark areas and highlighting surface imperfections.
- Mirrors: Handy for viewing hard-to-reach places and checking the underside of installed barriers.
- Magnifying Glasses: Useful for closely examining small cracks or defects that might not be visible to the naked eye.
Advanced Techniques In addition to visual inspections, advanced techniques can provide more detailed information about the condition of moisture barriers:
- Moisture Meters: These devices measure the moisture content in materials, helping to detect areas where moisture may be penetrating the barrier.
- Infrared Cameras: Infrared imaging can reveal temperature variations and moisture behind surfaces, indicating potential leaks or breaches in the barrier. This technology is particularly useful for identifying hidden moisture problems that are not visible on the surface.
- Hydrostatic Testing: For barriers designed to withstand water pressure, hydrostatic testing can be conducted to assess their integrity and performance under simulated conditions.
By following these inspection routines and utilizing the appropriate tools and techniques, property owners can effectively monitor the condition of their moisture barriers. Regular inspections help to identify and address issues early, preventing minor problems from escalating into significant damage and ensuring the long-term protection and effectiveness of moisture barriers.
Repairing Moisture Barriers
Minor Repairs
Fixing Small Tears and Punctures Minor damage such as small tears and punctures in moisture barriers can compromise their effectiveness if not addressed promptly. These small defects can be repaired using patch kits and sealants specifically designed for the type of barrier material in use.
Materials Needed
- Patch Kits: These typically include patches made from the same material as the barrier and adhesive to secure them.
- Sealants: Appropriate sealants that are compatible with the barrier material, such as silicone or polyurethane sealants.
- Tools: Utility knife, cleaning cloth, and a roller or squeegee.
Step-by-Step Repair Process
- Clean the Area: Ensure the area around the tear or puncture is clean and dry. Use a cleaning cloth to remove any dirt or debris.
- Prepare the Patch: Cut a patch that is slightly larger than the damaged area, allowing for overlap.
- Apply Sealant: Apply a thin layer of sealant around the edges of the tear or puncture.
- Place the Patch: Place the patch over the damaged area, pressing firmly to ensure good adhesion.
- Smooth the Patch: Use a roller or squeegee to smooth out the patch, ensuring there are no air bubbles and that the edges are well-sealed.
- Allow to Cure: Let the repair cure for the recommended time before exposing it to moisture.
Major Repairs
Addressing Larger Areas of Damage Larger areas of damage require more extensive repairs and a thorough assessment to determine the best approach. This may involve replacing sections of the barrier or applying additional layers of protection.
Assessing the Extent of the Damage Start by inspecting the entire barrier to understand the full extent of the damage. Look for multiple points of failure and any underlying issues that may have caused the damage, such as structural movement or improper initial installation.
Deciding When to Replace Sections vs. Repair
- Replace Sections: If the damage is extensive, it might be more effective to replace entire sections of the barrier. This ensures a uniform and reliable protection layer.
- Repair: For less extensive damage, reinforce the barrier by applying new layers over the damaged areas, ensuring all edges and seams are well-sealed.
Professional Repair Services
When to Call a Professional In cases where the damage is extensive or the repairs require specialized knowledge and equipment, it is advisable to call a professional. Professionals can accurately assess the damage, recommend the best course of action, and ensure the repairs are done correctly.
What to Expect from Professional Services
- Assessment and Consultation: A thorough assessment of the barrier condition and consultation on the best repair strategy.
- Quality Repairs: Professionals will use high-quality materials and advanced techniques to repair or replace the barrier.
- Guaranteed Workmanship: Professional services often come with guarantees, ensuring that the repairs will hold up over time and provide effective moisture protection.
By following these guidelines and principles, property owners can effectively manage repairs to their moisture barriers, ensuring long-lasting protection against water damage and maintaining the integrity of their buildings.
Maintaining Your Moisture Barrier
Preventative Measures
Steps to Prevent Damage Implementing preventative measures is essential to maintain the integrity of moisture barriers. Key steps include:
- Regular Inspections: Conduct frequent inspections to detect and address potential issues early.
- Proper Installation: Ensure the barrier is installed correctly according to manufacturer guidelines to minimize the risk of future damage.
Avoiding Sharp Objects and Heavy Equipment To prevent punctures and tears, avoid placing sharp objects or heavy equipment directly on the moisture barrier. Using padding or protective coverings can shield the barrier from physical damage during construction or renovation activities.
Using Protective Coverings Protective coverings, such as boards or temporary flooring, can safeguard the moisture barrier from damage caused by foot traffic, equipment, and other construction activities. These coverings should be used whenever heavy work is being conducted in areas where the barrier is installed.
Routine Maintenance Tasks
Cleaning and Debris Removal Keeping the moisture barrier clean and free from debris is crucial for its longevity. Regular cleaning prevents the accumulation of dirt, which can lead to mold growth and compromise the barrier's effectiveness.
Safe Cleaning Practices When cleaning the moisture barrier:
- Use Non-Abrasive Tools: Soft brushes and non-abrasive cleaning agents prevent damage to the barrier surface.
- Avoid Harsh Chemicals: Use mild, non-toxic cleaners to avoid chemical degradation of the barrier material.
- Regular Schedules: Establish a routine cleaning schedule, especially in areas prone to dirt and debris buildup.
Tools for Effective Cleaning Effective tools for maintaining a clean moisture barrier include:
- Soft Brushes and Brooms: For gently removing dirt and debris.
- Vacuum Cleaners: Suitable for dry debris removal without causing damage.
- Non-Toxic Cleaning Solutions: To safely clean the barrier without degrading the material.
Seasonal Maintenance
Adjustments for Different Weather Conditions Different seasons pose unique challenges to moisture barriers. Regular adjustments and inspections are necessary to ensure continued protection:
- Spring and Fall: These seasons are ideal for conducting thorough inspections and making necessary repairs before extreme weather conditions set in.
- Winter and Summer: Prepare the barrier to handle temperature extremes by checking for cracks or weaknesses that could expand under stress.
Preparing for Winter and Summer
- Winter: Ensure the barrier is protected against freeze-thaw cycles, which can cause cracks and separation. Adding insulation can help mitigate these effects.
- Summer: Protect the barrier from UV radiation and high temperatures, which can cause material degradation. Using UV-resistant coatings can extend the barrier's life.
Special Considerations for Extreme Climates In extreme climates, whether hot or cold,
additional measures are required:
- Hot Climates: Ensure the barrier is heat-resistant and protected from prolonged exposure to high temperatures.
- Cold Climates: Focus on flexibility and resistance to cracking during freeze-thaw cycles. Consider using materials designed specifically for low-temperature performance.
By following these maintenance guidelines, property owners can ensure that their moisture barriers remain effective, providing long-term protection against water damage and maintaining the structural integrity of their buildings .
Case Studies
Successful Repair and Maintenance
Examples of Effective Maintenance Routines One notable case study involves a commercial building where a comprehensive maintenance routine was implemented to preserve the integrity of its basement moisture barriers. The maintenance team conducted bi-annual inspections, focusing on high-risk areas such as seams, corners, and penetrations. During these inspections, they used moisture meters and infrared cameras to detect any hidden moisture issues. Minor damages, such as small tears and punctures, were promptly repaired using patch kits and sealants. This proactive approach prevented minor issues from escalating and ensured the barrier remained effective over time.
Lessons Learned from Successful Repairs From this example, several lessons can be drawn:
- Regular Inspections are Crucial: Consistent inspections help in early detection and repair of minor damages, preventing major failures.
- Use of Advanced Tools: Utilizing moisture meters and infrared cameras can identify problems that are not visible to the naked eye.
- Prompt Repairs: Addressing minor issues immediately prevents them from becoming significant problems, thereby extending the life of the moisture barrier.
Common Pitfalls and How to Avoid Them
Analysis of Common Repair Mistakes A common issue observed in many repair projects is the improper sealing of seams and joints. For instance, in a residential project, inadequate overlap and sealing of sheet membranes led to water infiltration during heavy rains, causing significant damage to the basement interior. Another common mistake is the use of incompatible repair materials, which can lead to chemical reactions and further degradation of the barrier.
Tips to Avoid These Issues To avoid these common pitfalls, consider the following tips:
- Ensure Proper Sealing: Always follow manufacturer guidelines for sealing seams and joints. Use sufficient overlap and appropriate sealants to ensure a watertight seal.
- Select Compatible Materials: Ensure that all repair materials are compatible with the existing barrier. Consult with manufacturers or professionals if unsure.
- Follow Correct Repair Procedures: Adhere strictly to the recommended repair procedures. Cutting corners can lead to inadequate repairs and future failures.
- Regular Training and Updates: Ensure that maintenance personnel are well-trained and kept up-to-date with the latest repair techniques and materials.
By understanding these common pitfalls and applying the lessons learned from successful maintenance routines, property owners and maintenance teams can significantly enhance the performance and longevity of their basement moisture barriers, ensuring effective protection against water damage.
FAQs
Contact Bull City Crawlspace Today!
Bull City Crawlspace will do everything we can to ensure your experience with us is excellent.
Request A FREE Estimate
Request a Free Estimate Form
Checkout Recent Post
Got a Question? We’re Here to Help.
You can arrange an appointment or make an enquiry by phone or email, orget in touch to us via our contact form.

