Mon-Fri: 8am to 8pm
304 Trail One Burlington NC 27215
jon@bullcitycrawlspace.com
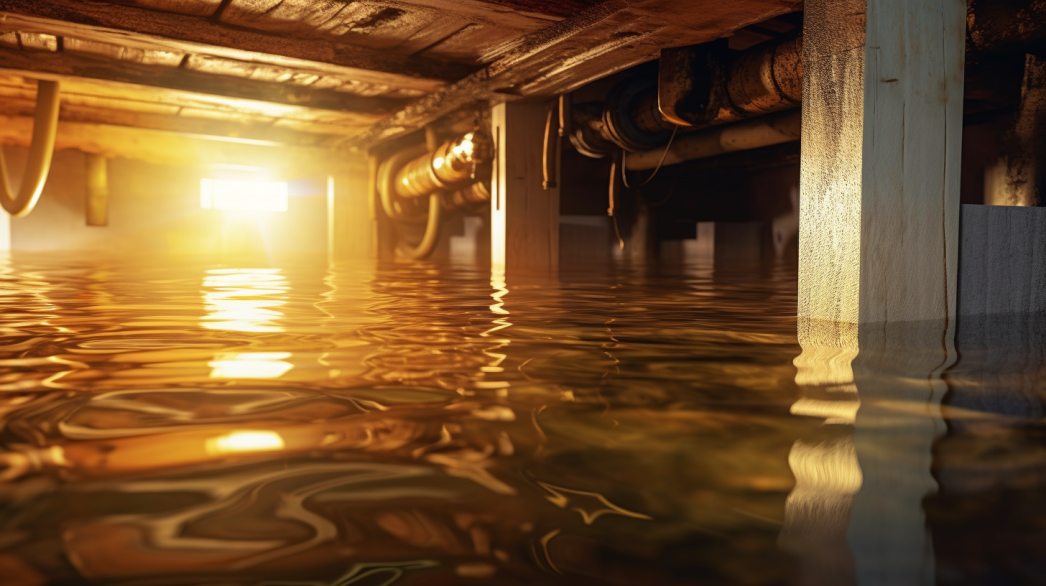
Moisture is a hidden threat that can wreak havoc on tile floors, leading to a range of issues that compromise both the appearance and structural integrity of your flooring. While tile is often praised for its durability and resistance to water, prolonged exposure to moisture can cause significant damage, particularly if it seeps beneath the surface.
When moisture penetrates the grout lines or the tiles themselves, it can reach the subflooring—a critical component of your flooring system. Over time, this moisture can weaken the subfloor, leading to warping, rotting, and even mold growth. These issues not only threaten the stability of the tile but also create a potentially hazardous environment in your home.
Additionally, moisture can cause the tiles to loosen, crack, or discolor, undermining the aesthetic appeal and functionality of your floor. Without proper moisture management, what begins as a minor issue can escalate into costly repairs or the need for complete floor replacement.
In this blog, we will explore how moisture affects tile floors, the warning signs of moisture damage, and the steps you can take to protect your flooring from this insidious problem. By understanding the risks and taking proactive measures, you can ensure the longevity and beauty of your tile floors for years to come.
Understanding Moisture Barriers for Tile Floors
What is a Moisture Barrier?
A moisture barrier is a protective layer designed to prevent water and moisture from
penetrating into the subfloor beneath tile installations. Its primary role is to create a continuous, impermeable layer that stops moisture from seeping through the tiles and grout, which could otherwise lead to significant structural issues over time.
In the context of flooring, it's important to distinguish between moisture barriers and vapor barriers. While both serve to protect against moisture, they do so in different ways. A moisture barrier is specifically designed to block liquid water from passing through, making it essential in areas where direct water exposure is common. On the other hand, a vapor barrier primarily slows down or prevents the passage of moisture vapor, which is the gaseous form of water. Vapor barriers are typically used to control condensation in areas where temperature and humidity fluctuations occur but may not provide the full protection needed in high-moisture environments.
Understanding the role of a moisture barrier and how it differs from a vapor barrier is crucial in selecting the right protection for your tile floors, particularly in spaces prone to high moisture levels.
Why Moisture Barriers are Crucial for Tile Installation
Moisture barriers are a critical component in tile installation, especially in environments where moisture exposure is a constant concern. Here’s why they are so essential:
- Prevents Moisture from Seeping into the Subfloor: One of the primary functions of a moisture barrier is to protect the subfloor from water infiltration. Without this barrier, moisture can seep through the grout lines or even the tiles themselves, leading to the accumulation of water beneath the floor. This trapped moisture can result in mold and mildew growth, which not only compromises the structural integrity of the subfloor but also poses health risks to occupants. Over time, unchecked moisture can cause the subfloor to warp, rot, and ultimately fail, necessitating expensive repairs or complete floor replacement.
- Enhances the Durability and Longevity of Tile Flooring: By effectively blocking moisture, a moisture barrier helps preserve the integrity of both the tiles and the subfloor. Moisture can cause tiles to loosen, crack, and even discolor, particularly if the underlying subfloor begins to deteriorate. Installing a moisture barrier mitigates these risks, ensuring that your tile flooring remains stable, durable, and visually appealing for many years. This added protection is especially valuable in areas with heavy foot traffic, where the constant use can exacerbate the effects of any moisture damage.
- Necessary for Certain Environments: Moisture barriers are indispensable in environments where moisture exposure is particularly high, such as basements, bathrooms, and kitchens. These spaces are naturally prone to higher humidity levels, frequent spills, and the potential for standing water, making them prime candidates for moisture-related problems. In these settings, a moisture barrier is not just recommended but necessary to protect the subfloor and maintain the overall health of the flooring system.
In conclusion, moisture barriers play an indispensable role in tile installation by preventing moisture-related damage, enhancing the durability of the flooring, and ensuring that your tile floors can withstand the unique challenges posed by high-moisture environments.
Types of Moisture Barriers Suitable for Tile Floors
Liquid Applied Membranes
Liquid-applied membranes are a versatile and effective type of moisture barrier that is applied in liquid form and then dries to create a seamless, waterproof layer. These membranes are typically composed of synthetic rubber, elastomeric compounds, or other waterproofing agents that, once cured, form a continuous barrier that adheres directly to the substrate.
How They Work: When applied, liquid membranes conform to the surface, filling in cracks, gaps, and irregularities that might be present. This makes them particularly effective in areas where the surface is uneven or complex, as they can easily adapt to different shapes and contours. Once dried, the membrane forms an impermeable layer that prevents moisture from penetrating the subfloor, thereby protecting the structure beneath the tile installation.
Ideal Use Cases: Liquid-applied membranes are ideal for high-moisture areas such as bathrooms, kitchens, and basements. They are also highly effective on irregular surfaces, where traditional sheet membranes might struggle to provide complete coverage. Because of their flexibility and ease of application, liquid membranes are often used in renovation projects where existing structures may present challenges for other types of barriers.
Sheet Membranes
Sheet membranes are pre-formed moisture barriers made from materials such as polyethylene or rubberized asphalt. These membranes come in large rolls and are typically laid out across the surface to create a protective layer between the subfloor and the tile installation.
Benefits: The primary advantage of sheet membranes is their durability and consistency in providing a waterproof barrier. Because they are manufactured to specific standards, sheet membranes offer reliable protection that is less dependent on the installer’s technique compared to liquid-applied options. They also provide an additional layer of strength to the subfloor, which can help reduce the risk of cracks and other structural issues.
Common Materials: Sheet membranes are commonly made from polyethylene, known for its excellent water resistance and flexibility, or rubberized asphalt, which offers superior adhesion and waterproofing properties. These materials are chosen for their ability to withstand prolonged exposure to moisture without degrading, making them ideal for use under tile floors in wet environments.
Best Practices for Installation: When installing sheet membranes under tile floors, it’s crucial to ensure that the membrane is laid out smoothly with no wrinkles or air pockets. Overlapping seams should be sealed with appropriate tape or adhesive to maintain the integrity of the moisture barrier. Additionally, care should be taken to extend the membrane slightly up the walls to create a continuous moisture barrier that protects the entire area.
Uncoupling Membranes with Moisture Protection
Uncoupling membranes are specialized products that serve a dual function: they provide moisture protection while also reducing stress on tile installations. These membranes are typically made from a thin layer of plastic or other flexible materials with a grid-like structure that allows for independent movement between the subfloor and the tiles.
Overview and Function: The primary purpose of uncoupling membranes is to decouple the tile layer from the subfloor, which helps prevent cracks and damage caused by movement or settling of the substrate. At the same time, these membranes act as a moisture barrier, preventing water from reaching the subfloor and causing issues such as mold, mildew, or rot.
When to Use Uncoupling Membranes: Uncoupling membranes are particularly beneficial in areas with heavy foot traffic or where there is potential for substrate movement, such as on concrete slabs or in older buildings where settling is common. They are also ideal for installations over radiant heating systems, where the expansion and contraction of materials can put additional stress on the tile.
By providing both moisture protection and stress relief, uncoupling membranes help ensure that tile installations remain durable and free from damage, even in challenging environments.
How to Choose the Right Moisture Barrier for Your Tile Floor
Assessing the Subfloor Type
Concrete Subfloors
When selecting a moisture barrier for tile floors over concrete subfloors, it’s essential to consider the moisture transmission rates of the concrete. Concrete is porous, which means it can absorb and transmit moisture from the ground up into the flooring. If not properly managed, this moisture can lead to issues like efflorescence (salt deposits), mold growth, and deterioration of the tile adhesive.
- Considerations: The key consideration when working with concrete subfloors is the level of moisture that can pass through the material. High moisture transmission rates require a barrier that can effectively block both liquid water and water vapor to prevent damage to the tile and subfloor.
- Recommendations: Liquid-applied membranes are an excellent choice for concrete subfloors. These barriers create a seamless, fully adhered layer that can adapt to any imperfections in the concrete surface, ensuring comprehensive protection against moisture. Additionally, their flexibility makes them ideal for covering large areas or irregular surfaces commonly found in concrete subflooring.
Wooden Subfloors
Wooden subfloors are particularly vulnerable to moisture, which can cause warping, swelling, and rot if not properly protected. Therefore, selecting the right moisture barrier is critical to maintaining the integrity of the wood and ensuring a long-lasting tile installation.
- Importance of Protection: Wood is highly susceptible to damage from moisture, making it essential to choose a barrier that not only prevents water from reaching the subfloor but also controls moisture vapor that can lead to condensation and subsequent wood decay.
- Best Barrier Options: For wooden subfloors, sheet membranes with vapor retarders are highly recommended. These membranes offer a durable, impermeable layer that blocks moisture while also controlling vapor transmission. The addition of a vapor retarder helps manage the humidity levels beneath the tiles, reducing the risk of condensation and prolonging the life of the wooden subfloor.
Evaluating the Installation Environment
High-Moisture Areas
In environments where moisture exposure is consistently high, such as bathrooms, kitchens, and basements, robust moisture protection is essential to prevent long-term damage to both the tile and subfloor.
- Importance of Protection: High-moisture areas are particularly prone to issues like mold, mildew, and structural damage, making it crucial to choose a moisture barrier that offers comprehensive protection. These areas often require barriers that are not only waterproof but also resistant to mold and mildew growth.
- Recommended Barriers: Liquid-applied membranes with added mold inhibitors are ideal for high-moisture environments. These barriers provide a seamless, waterproof layer that is resistant to fungal growth, ensuring that your tile floor remains secure and free from moisture-related damage over time.
Standard Moisture Areas
For areas with standard moisture exposure, such as living rooms or bedrooms, the need for heavy-duty moisture barriers is less critical. However, it’s still important to provide adequate protection to prevent any moisture issues that could arise.
- Options for Protection: In standard moisture areas, cost-effective barriers that still offer sufficient moisture protection are the best choice. These might include simpler sheet membranes or vapor barriers that provide a basic level of protection without the added expense of high-performance products.
- Cost-Effective Solutions: Consider using polyethylene sheets or basic peel-and-stick membranes in these areas. These options provide a reliable moisture barrier at a lower cost, making them a practical choice for spaces where the risk of moisture damage is minimal.
Budget and Installation Ease
Cost vs. Performance
When choosing a moisture barrier, it’s essential to balance cost with the need for long-term protection. While high-performance barriers offer superior protection, they can also come with a higher price tag. It’s important to weigh the benefits of these products against your budget to find the best solution for your needs.
- Balancing Costs: High-end options like liquid-applied membranes or uncoupling membranes with moisture protection tend to be more expensive but offer the best protection for high-risk areas. For lower-risk areas, more affordable options like basic sheet membranes can provide adequate protection without exceeding your budget.
- Cost Comparison: Generally, liquid-applied membranes and uncoupling membranes are at the higher end of the cost spectrum, while polyethylene sheet membranes and vapor retarders are more budget-friendly. Consider the specific needs of each area in your home to determine where it’s worth investing in higher-performance products.
DIY-Friendly vs. Professional Installation
The ease of installation can also play a significant role in choosing the right moisture barrier, especially if you plan to undertake the project yourself.
- DIY-Friendly Options: For those looking to tackle the installation on their own, peel-and-stick sheet membranes are an excellent choice. These barriers are easy to apply, requiring minimal tools and expertise, making them ideal for DIY projects. They offer reliable moisture protection without the need for specialized equipment or professional skills.
- When to Hire a Professional: In more complex scenarios, such as installing moisture barriers in high-moisture areas or on irregular surfaces, hiring a professional might be the best approach. Liquid-applied membranes, for example, require precise application to ensure a seamless barrier, and uncoupling membranes may need expert installation to function effectively in reducing stress on the tile and providing moisture protection.
Step-by-Step Guide to Installing a Moisture Barrier for Tile Floors
Preparing the Subfloor
Cleaning and Leveling the Surface
- Importance of a Clean, Debris-Free Surface for Proper Barrier Adhesion: Before installing a moisture barrier, it is crucial to ensure that the subfloor is completely clean and free of any debris, dust, or loose materials. A clean surface allows the moisture barrier to adhere properly, creating a seamless and effective protective layer. Any dirt or particles left on the surface can prevent the barrier from bonding correctly, leading to gaps or bubbles that could allow moisture to penetrate.
- Steps to Level the Subfloor if Needed Before Installation: If the subfloor is uneven, it is essential to level it before installing the moisture barrier. An uneven subfloor can cause the barrier to wrinkle or lift, compromising its effectiveness. To level the subfloor:
- Use a self-leveling compound or floor patching material to fill in low spots or uneven areas.
- Smooth out the compound with a trowel, ensuring a flat, even surface.
- Allow the compound to dry completely before proceeding with the installation.
Moisture Testing
How to Perform a Moisture Test on Your Subfloor (e.g., Using a Moisture Meter): Before installing a moisture barrier, it is important to assess the moisture levels in your subfloor. Use a moisture meter to test various spots across the subfloor:
- Place the meter’s probes onto the subfloor surface and take a reading.
- Compare the readings against the recommended moisture levels for your specific subfloor material. High moisture levels can indicate potential issues that need to be addressed before installing the barrier.
Importance of Addressing High Moisture Levels Before Proceeding: If the moisture levels in your subfloor are too high, installing a moisture barrier without addressing this issue could trap moisture beneath the barrier, leading to mold, mildew, and damage over time. If high moisture is detected:
- Consider using a dehumidifier to reduce moisture levels.
- In severe cases, you may need to install a more robust moisture management system, such as a vapor retarder, before proceeding with the barrier installation.
Installing the Moisture Barrier
Cutting the Barrier to Fit
Measuring the Area to Ensure the Barrier Covers the Entire Floor: Accurate measurement is key to ensuring the moisture barrier fully covers the subfloor without any gaps. Use a measuring tape to determine the dimensions of the floor area:
- Measure each wall and account for any irregularities or obstacles.
- Mark these measurements on the moisture barrier material before cutting.
Tips for Cutting and Fitting the Barrier Around Obstacles Like Pipes or Vents: When cutting the barrier, ensure it fits snugly around any pipes, vents, or other obstacles:
- Use a utility knife to carefully cut the barrier to the appropriate size, allowing for a tight fit around obstacles.
- Cut small slits where necessary to maneuver the barrier around pipes, ensuring that the barrier lies flat against the subfloor.
Adhering the Barrier to the Subfloor
Techniques for Applying Liquid Membranes (e.g., Using a Roller or Brush): For liquid-applied moisture barriers:
- Use a roller or brush to apply the membrane evenly across the subfloor, ensuring full coverage.
- Start at one end of the room and work your way across, applying the membrane in thin, even layers.
- Be sure to follow the manufacturer’s instructions regarding thickness and application technique.
How to Properly Lay and Secure Sheet Membranes to Avoid Air Pockets and Gaps: When using sheet membranes:
- Begin by laying the membrane flat on the subfloor, starting at one corner and working your way out.
- Use a roller or your hands to smooth out the membrane as you go, pressing it firmly into place to eliminate air pockets.
- Overlap seams by a few inches and seal them with appropriate tape or adhesive to ensure a continuous barrier.
Sealing Seams and Edges
Importance of Sealing All Seams with Appropriate Tape or Sealant: Properly sealed seams are critical to the effectiveness of the moisture barrier. Use a high-quality sealant tape designed for moisture barriers:
- Apply the tape directly over the seams, pressing firmly to ensure a tight seal.
- For liquid membranes, use a compatible sealant to cover any overlaps or joins.
Ensuring Edges Are Sealed to Prevent Moisture from Entering: Pay special attention to the edges of the moisture barrier, particularly where it meets walls or other vertical surfaces:
- Seal all edges with the same tape or sealant used for seams.
- Extend the barrier slightly up the walls if possible, creating a “cove” that further protects against moisture ingress.
Final Steps Before Tile Installation
Inspecting the Moisture Barrier
Checking for Any Gaps, Wrinkles, or Imperfections in the Barrier: Before proceeding with tile installation, carefully inspect the entire moisture barrier:
- Look for any gaps, wrinkles, or areas where the barrier may not be fully adhered to the subfloor.
- If any issues are found, address them immediately by reapplying the barrier or sealing any gaps to ensure complete protection.
Ensuring Full Coverage and Secure Adhesion to the Subfloor: Double-check that the moisture barrier covers the entire subfloor with no exposed areas:
- Press down on the barrier to ensure it is securely adhered to the subfloor, particularly around edges and obstacles.
Allowing the Barrier to Cure
Recommended Curing Times for Different Types of Moisture Barriers: Different moisture barriers have varying curing times, which are critical to their effectiveness:
- Refer to the manufacturer’s instructions for the recommended curing time before proceeding.
- Typically, liquid-applied membranes require several hours to a full day to cure, depending on environmental conditions.
Preparing the Surface for Tile Installation Once the Barrier Is Fully Set: Once the moisture barrier has fully cured:
- Ensure the surface is clean and free of any dust or debris.
- You can then proceed with laying your tile, confident that the subfloor is protected from moisture-related issues.
Common Mistakes to Avoid During Moisture Barrier Installation
When installing a moisture barrier for tile floors, careful attention to detail is crucial to ensure the barrier functions effectively. However, several common mistakes can undermine the installation process, leading to potential moisture damage over time. Here are key mistakes to avoid:
Overlooking the Importance of Subfloor Preparation
One of the most critical steps in moisture barrier installation is proper subfloor preparation. Skipping or inadequately performing this step can significantly compromise the barrier's effectiveness:
- Surface Cleanliness: A subfloor that is not thoroughly cleaned of dirt, dust, or debris can prevent the moisture barrier from adhering correctly. Any remaining particles can create gaps between the barrier and the subfloor, allowing moisture to seep through.
- Leveling the Subfloor: If the subfloor is uneven, the moisture barrier may wrinkle or fail to adhere uniformly, leading to weak spots that are vulnerable to moisture ingress. Ensuring the subfloor is level before installation is essential for a smooth, effective barrier application.
To avoid these issues, always clean and level the subfloor thoroughly before applying the moisture barrier.
Using Incompatible Materials for the Specific Subfloor Type
Choosing the right moisture barrier material for your specific subfloor type is critical. Using incompatible materials can lead to insufficient protection and potential long-term damage:
- Concrete Subfloors: Concrete is porous and can transmit moisture from the ground up. Using a barrier not designed to handle this type of moisture transmission, such as a simple vapor barrier, may not provide adequate protection. Instead, opt for a liquid-applied membrane that forms a continuous, impermeable layer.
- Wooden Subfloors: Wood is highly susceptible to moisture, which can cause warping and rot. Applying a moisture barrier that doesn’t offer enough protection against both moisture and vapor can leave the wood exposed to damage. Sheet membranes with vapor retarders are typically the best choice for wooden subfloors.
Selecting the correct barrier material for your subfloor type ensures that the installation will effectively protect against moisture.
Failing to Properly Seal Seams and Edges, Leading to Potential Moisture Ingress
Properly sealing seams and edges is essential to creating a continuous moisture barrier. Failing to do so can result in gaps where moisture can enter, compromising the entire installation:
- Seam Sealing: Overlapping the seams without properly sealing them with tape or adhesive can leave small openings that allow moisture to penetrate the subfloor. Always use high-quality sealant or tape specifically designed for moisture barriers to ensure that seams are fully sealed.
- Edge Sealing: Edges where the barrier meets walls, pipes, or other obstacles are particularly vulnerable. If these edges are not sealed correctly, moisture can enter through these weak points and cause damage. Ensure that all edges are sealed tightly, extending the barrier slightly up walls where possible to create a comprehensive seal.
By taking the time to seal all seams and edges carefully, you can prevent moisture from undermining the barrier’s effectiveness.
Rushing the Curing Process, Which Can Compromise the Effectiveness of the Barrier
Rushing the curing process is a common mistake that can greatly reduce the effectiveness of the moisture barrier:
- Incomplete Curing: Different moisture barriers require specific curing times to fully set and create an effective moisture seal. If you rush this process and proceed with tile installation before the barrier has fully cured, you risk compromising the barrier’s integrity, leading to potential moisture infiltration.
- Environmental Factors: Factors such as humidity, temperature, and ventilation can affect the curing time. It’s important to consider these factors and allow the barrier to cure completely, even if it takes longer than expected.
Always follow the manufacturer’s instructions for curing times, and resist the temptation to rush the process. Proper curing is essential to ensure the barrier provides the protection your tile floor needs.
FAQs
Contact Bull City Crawlspace Today!
Bull City Crawlspace will do everything we can to ensure your experience with us is excellent.
Request A FREE Estimate
Request a Free Estimate Form
Checkout Recent Post


Got a Question? We’re Here to Help.
You can arrange an appointment or make an enquiry by phone or email, orget in touch to us via our contact form.
Business Hours:
Monday - Friday 8:00 AM - 8:00 PM Saturday and Sunday: Closed
We're your local family owned, operated and licensed crawl space repair and waterproofing company.
919-724-4601
jon@bullcitycrawlspace.com
Services
NATIONWIDE LEADER
Claim you free crawl space consultation today by clicking the button below.
Contact Info
Business Hours:
Mon to Fri: 8:00am - 8:00pm