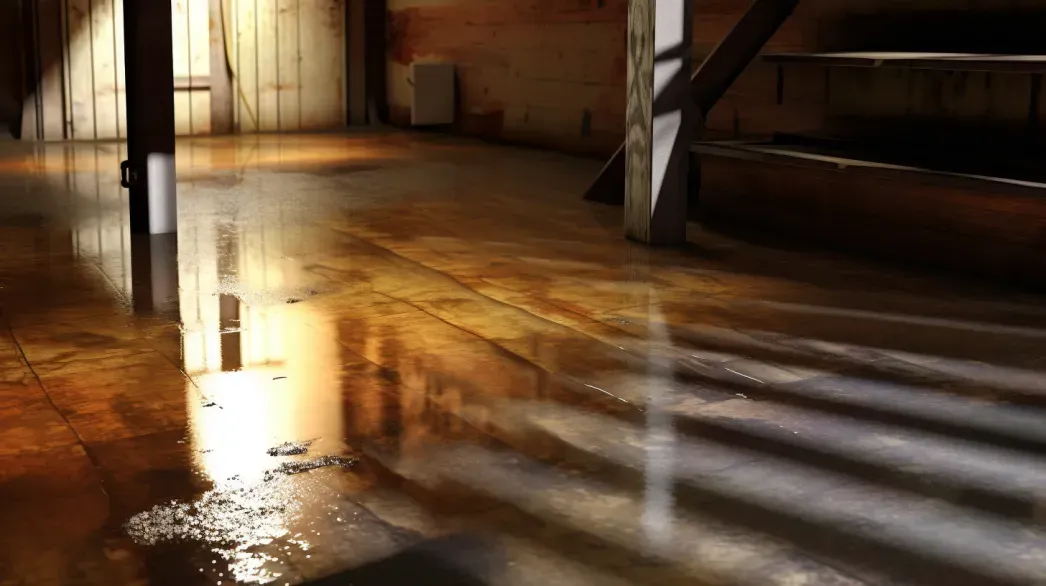
A moisture barrier, often referred to as a vapor barrier, is an essential component in building construction and various other applications. Its primary function is to prevent the passage of moisture from one area to another, thereby protecting structures and materials from the detrimental effects of moisture accumulation. Moisture barriers are commonly used in walls, floors, and roofs to enhance the durability and integrity of buildings by mitigating the risks associated with moisture intrusion, such as mold growth, structural decay, and insulation damage.
Understanding the purpose and types of moisture barriers is crucial for selecting the right materials and methods for effective moisture management in different environments. This blog will explore the definition of a moisture barrier, its importance in construction, various types of moisture barriers available, and their specific applications. By the end of this article, you will have a comprehensive understanding of how moisture barriers contribute to maintaining the longevity and safety of structures.
Benefits of Installing Moisture Barriers
Health Benefits
Reducing the Risk of Mold-Related Health Issues Moisture barriers play a critical role in maintaining a healthy indoor environment by preventing the accumulation of moisture within building structures. Excess moisture can lead to the growth of mold and mildew, which can pose significant health risks to occupants. Mold spores can trigger allergic reactions, asthma, and other respiratory problems. By effectively controlling moisture levels, moisture barriers help reduce the risk of mold growth, thereby safeguarding the health of residents.
Improving Overall Indoor Air Quality A well-installed moisture barrier contributes to better indoor air quality by preventing dampness and reducing the likelihood of airborne pollutants and allergens. When moisture infiltrates building materials, it can create an environment conducive to the proliferation of dust mites and other allergens. By keeping moisture at bay, moisture barriers help ensure that the indoor air remains clean and safe to breathe, promoting the well-being of all occupants.
Structural Benefits
Prolonging the Lifespan of Building Materials Building materials such as wood, drywall, and insulation are susceptible to damage when exposed to moisture over time. Moisture barriers serve as a protective shield, preventing water vapor from penetrating these materials and causing deterioration. By keeping building components dry, moisture barriers help extend their lifespan, ensuring that the structural integrity of the building is maintained for years to come.
Preventing Structural Damage Caused by Moisture Uncontrolled moisture can lead to severe structural issues, including wood rot, corrosion of metal components, and weakening of foundations. These problems can compromise the safety and stability of a building. Moisture barriers are essential in preventing such damage by blocking the entry of moisture, thereby preserving the strength and durability of the structure. This proactive approach helps avoid costly repairs and potential safety hazards.
Financial Benefits
Cost Savings on Repairs and Maintenance Investing in moisture barriers can result in significant cost savings over time. By preventing moisture-related damage, property owners can avoid the expenses associated with repairing or replacing damaged building materials. Regular maintenance costs are also reduced, as moisture barriers help keep the building in better condition, minimizing the need for frequent repairs and interventions.
Increasing Property Value A building equipped with effective moisture barriers is more attractive to potential buyers and investors. Moisture control is a key factor in ensuring a property's longevity and functionality. Homes and buildings that demonstrate superior moisture management are perceived as well-maintained and less likely to have hidden issues. This perception can enhance the property's market value, making it a worthwhile investment for current and future owners.
In conclusion, installing moisture barriers offers a range of benefits that encompass health, structural integrity, and financial savings. By reducing the risk of mold-related health issues, improving indoor air quality, prolonging the lifespan of building materials, preventing structural damage, and providing cost savings, moisture barriers are an essential component in modern construction practices.
Basics of Moisture Barrier Installation
Types of Moisture Barriers
Vapor Barriers vs. Moisture Barriers Understanding the distinction between vapor barriers and moisture barriers is essential for effective installation. Vapor barriers are designed to prevent water vapor from passing through walls, floors, and ceilings, thus controlling humidity levels within the structure. In contrast, moisture barriers, often used interchangeably with vapor barriers, primarily focus on preventing liquid water from penetrating building materials. Both play crucial roles in protecting a building from the damaging effects of moisture, but their specific applications and performance characteristics can differ.
Popular Materials: Polyethylene Sheeting, Liquid-Applied Membranes, etc. Several materials are commonly used for moisture barriers, each suited to different installation requirements and environments:
- Polyethylene Sheeting: This is one of the most popular and cost-effective moisture barriers. It is easy to install and provides excellent resistance to moisture.
- Liquid-Applied Membranes: These membranes are applied as a liquid and then cure to form a seamless, flexible barrier that adheres to a variety of surfaces. They are ideal for complex geometries and surfaces where sheet membranes would be difficult to apply.
- Foil-Surfaced Barriers: Often used in attics and walls, these barriers reflect heat and help control moisture in addition to vapor.
- Rubberized Asphalt: This material is highly effective in providing a waterproof barrier and is commonly used in foundation walls and roofs.
Each of these materials has specific benefits and applications, making it important to choose the right one based on the building’s needs and local climate conditions.
Tools and Materials Needed
List of Essential Tools: Utility Knife, Tape Measure, etc. The successful installation of moisture barriers requires a set of essential tools to ensure accuracy and effectiveness:
- Utility Knife: For cutting barrier materials to the correct size and shape.
- Tape Measure: To measure the areas where the moisture barrier will be applied, ensuring precise coverage.
- Staple Gun: For securing barriers to wooden surfaces.
- Seam Roller: To press down and seal edges and seams of sheet barriers.
- Brushes and Rollers: For applying liquid-applied membranes evenly.
- Protective Gear: Such as gloves and safety glasses, to protect the installer during the application process.
These tools help in preparing and installing moisture barriers accurately, ensuring a secure and effective moisture control system.
Recommended Materials: Specific Brands or Types of Barriers Choosing high-quality materials is crucial for the durability and performance of moisture barriers. Here are some recommended brands and types:
- Polyethylene Sheeting: Brands like Visqueen and Husky offer durable and reliable options for a variety of applications.
- Liquid-Applied Membranes: Products like Henry Company’s 787 Elastomeric Fluid Applied Waterproofing and Mapei’s Mapelastic AquaDefense are well-regarded for their ease of application and effectiveness.
- Foil-Surfaced Barriers: Reflectix and RadiantGUARD are popular choices for reflective moisture barriers, providing both moisture control and thermal insulation.
- Rubberized Asphalt: Grace Construction Products’ Bituthene and Carlisle’s CCW-500 are trusted for their waterproofing capabilities and longevity.
Selecting the right tools and materials not only simplifies the installation process but also ensures that the moisture barrier performs effectively, protecting the building from moisture-related issues.
In conclusion, understanding the types of moisture barriers, the necessary tools, and recommended materials is fundamental to the successful installation of a moisture barrier system. By carefully selecting and correctly applying these barriers, homeowners and builders can significantly enhance the durability, health, and value of their buildings.
Step-by-Step Installation Guide for Moisture Barriers
Preparation
Assessing the Area for Moisture Issues Before beginning the installation, it is crucial to assess the area for existing moisture problems. Look for signs of water damage, mold, or dampness. Identifying these issues early helps in determining the extent of the moisture barrier needed and ensures that any existing problems are addressed before installation.
Cleaning and Drying the Installation Area A clean and dry surface is essential for the effective application of a moisture barrier. Remove any dirt, debris, or existing materials that might interfere with adhesion. Use a mild detergent to clean the surface, and allow it to dry completely. In areas prone to high humidity, consider using a dehumidifier to ensure the area is thoroughly dry.
Gathering Necessary Tools and Materials Ensure all tools and materials are on hand before starting the installation process. Essential tools include a utility knife, tape measure, staple gun, seam roller, brushes or rollers for liquid-applied membranes, and protective gear such as gloves and safety glasses. Have the moisture barrier material ready, whether it’s polyethylene sheeting, liquid-applied membrane, or another type.
Installation Process
Step 1: Measure and Cut the Barrier
Measuring the Area Accurately Accurate measurement is critical for a seamless installation. Use a tape measure to determine the dimensions of the area where the moisture barrier will be applied. Measure both the length and width, taking into account any irregular shapes or obstacles.
Cutting the Barrier to Fit the Space Once the measurements are taken, transfer them to the moisture barrier material. Use a utility knife or scissors to cut the barrier to the appropriate size. Ensure the cuts are straight and precise to avoid gaps and overlaps during installation.
Step 2: Position the Barrier
Placing the Barrier in the Desired Location Lay the moisture barrier in the area it is intended to cover. Start at one end and gradually unroll or unfold the material, ensuring it covers the entire surface. For large areas, work in sections to maintain control over the placement.
Ensuring the Barrier is Smooth and Wrinkle-Free As you position the barrier, smooth out any wrinkles or bubbles. Use your hands or a seam roller to press the material firmly against the surface, ensuring it adheres well and provides a uniform protective layer.
Step 3: Secure the Barrier
Methods for Securing the Barrier There are various methods to secure the moisture barrier, depending on the type of material and the surface. Common methods include:
- Adhesive: Apply a waterproof adhesive along the edges and seams to hold the barrier in place.
- Staples: Use a staple gun to attach the barrier to wooden surfaces, ensuring staples are spaced evenly for a tight hold.
Ensuring a Tight Seal Around Edges and Seams To prevent moisture infiltration, it’s essential to seal all edges and seams securely. Overlap seams by a few inches and apply adhesive or tape specifically designed for moisture barriers. Press firmly to ensure a tight seal, and use a seam roller to flatten and secure the overlaps.
Post-Installation Tips
Inspecting the Installation for Any Gaps or Issues After the barrier is installed, inspect the entire area thoroughly. Look for any gaps, wrinkles, or loose sections that could allow moisture to penetrate. Address any issues immediately by resealing or adjusting the barrier as needed.
Maintenance Tips for Long-Term Effectiveness To ensure long-term effectiveness of the moisture barrier, follow these maintenance tips:
- Regular Inspections: Periodically check the barrier for signs of wear or damage, especially after severe weather or high humidity periods.
- Repair Damage Promptly: If any part of the barrier is compromised, repair it immediately to maintain its protective function.
- Control Indoor Humidity: Use dehumidifiers in areas prone to high humidity to reduce the risk of moisture accumulation.
By following these steps and maintenance tips, you can ensure that your moisture barrier provides effective and lasting protection against moisture-related issues. Proper installation and upkeep will help maintain the structural integrity and health of your building.
Common Mistakes to Avoid
Incorrect Measurement
Importance of Accurate Measurements Accurate measurement is fundamental to the effective installation of moisture barriers. Incorrect measurements can lead to gaps, overlaps, and inefficiencies that compromise the barrier’s integrity and performance. Proper measurements ensure that the barrier covers the entire intended area without leaving any unprotected spots, thereby maximizing its effectiveness.
Tips for Avoiding Measurement Errors To avoid measurement errors:
- Double-Check Measurements: Always measure the area at least twice to confirm accuracy. Use a reliable tape measure and record your measurements precisely.
- Include Allowances: When cutting the material, add a few extra inches to each measurement to account for any adjustments or overlaps needed during installation.
- Use a Level: For vertical applications, use a level to ensure that your measurements are straight and even, preventing misalignment.
Poor Sealing
Consequences of Inadequate Sealing Inadequate sealing can lead to significant problems, such as moisture penetration and mold growth. Poorly sealed edges and seams allow water and vapor to seep through, undermining the barrier's purpose and potentially causing damage to building materials and indoor air quality.
How to Properly Seal Edges and Seams To ensure proper sealing:
- Use the Right Materials: Apply high-quality adhesive or tape specifically designed for moisture barriers. These products ensure a strong, durable seal.
- Overlap Seams: When joining two pieces of the barrier, overlap them by a few inches to create a more secure seal. Apply adhesive or tape along the entire seam and press firmly to eliminate any gaps.
- Press and Smooth: Use a seam roller to press down on the adhesive or tape, ensuring it adheres fully to the barrier. Smooth out any wrinkles or bubbles that could compromise the seal.
Using Inappropriate Materials
Risks of Using Non-Recommended Materials Using materials not recommended for moisture barriers can lead to a range of issues, from reduced effectiveness to potential health hazards. Inappropriate materials may not provide the necessary resistance to moisture, leading to leaks and structural damage. Additionally, some materials might release harmful chemicals when exposed to moisture or high temperatures.
Choosing the Right Material for Specific Environments To choose the right material:
- Consider the Environment: Select a moisture barrier material that suits the specific conditions of the installation area. For instance, areas with high humidity or groundwater presence may require more robust, durable barriers like liquid-applied membranes or rubberized asphalt.
- Follow Manufacturer Recommendations: Use materials that are explicitly recommended for moisture barrier applications by manufacturers. These materials are tested and proven to perform effectively in various conditions.
- Consult Professionals: If unsure about the appropriate material, consult with building professionals or experts who can provide guidance based on the specific requirements of your project.
By avoiding these common mistakes—ensuring accurate measurements, proper sealing, and the use of appropriate materials—you can enhance the effectiveness of your moisture barrier installation. These best practices help in maintaining the structural integrity of your building, improving indoor air quality, and protecting against moisture-related damages.
Post-Installation Tips
Inspecting the Installation
Checking for Gaps or Improperly Sealed Areas After installing a moisture barrier, a thorough inspection is essential to ensure its effectiveness. Carefully examine the entire barrier for any gaps or areas where the seal may be inadequate. Pay special attention to edges, seams, and corners, as these are common trouble spots where moisture can infiltrate if not properly sealed. Use a flashlight to highlight any potential gaps or unsealed sections, and address them promptly to maintain the barrier’s integrity.
Ensuring Continuous Coverage Continuous coverage is crucial for a moisture barrier to function correctly. Inspect the barrier to confirm that it provides a seamless layer of protection across the entire surface. Look for any overlaps or joins between sections of the barrier to ensure they are adequately sealed and that there are no breaks in coverage. Ensuring continuous coverage prevents moisture from finding weak points to penetrate, thereby offering comprehensive protection for the building structure.
Maintenance Tips
Regular Inspection for Damage or Wear To maintain the effectiveness of your moisture barrier, conduct regular inspections. Check the barrier periodically for signs of damage, wear, or deterioration. Look for any tears, punctures, or areas where the barrier may have become loose. Regular inspections help catch potential issues early, allowing for timely repairs before they develop into more significant problems.
Repairing Any Breaches in the Barrier If any breaches are found during inspections, it is crucial to repair them immediately to prevent moisture from entering. Use appropriate repair materials, such as patches of the same barrier material or recommended adhesive tapes, to seal any holes or tears. Ensure that repairs are done thoroughly and securely to restore the barrier’s continuous coverage and effectiveness.
Tips for Maintaining Effectiveness Over Time Maintaining the effectiveness of your moisture barrier over time requires ongoing attention and care:
- Control Indoor Humidity: Use dehumidifiers in areas prone to high humidity to reduce the risk of moisture buildup behind the barrier.
- Avoid Physical Damage: Be cautious when performing other construction or maintenance work around the barrier to prevent accidental damage.
- Monitor Environmental Changes: Be aware of any changes in the environment, such as increased humidity or water leakage, which might affect the barrier’s performance. Address these changes promptly.
- Reapply or Upgrade: Over time, the materials in the barrier may degrade or become less effective. Plan for periodic reapplication or upgrading of the barrier to newer, more durable materials if necessary.
By following these post-installation tips, you can ensure that your moisture barrier remains effective and continues to protect your building from moisture-related issues. Regular inspections, prompt repairs, and proactive maintenance are key to preserving the integrity and longevity of your moisture barrier system.
FAQs
Contact Bull City Crawlspace Today!
Bull City Crawlspace will do everything we can to ensure your experience with us is excellent.
Request A FREE Estimate
Request a Free Estimate Form
Checkout Recent Post


Got a Question? We’re Here to Help.
You can arrange an appointment or make an enquiry by phone or email, orget in touch to us via our contact form.