Mon-Fri: 8am to 8pm
304 Trail One Burlington NC 27215
jon@bullcitycrawlspace.com
Welcome to our essential guide on the critical process of mold removal, a task that stands at the intersection of protecting your health and preserving the integrity of your property. Mold, a seemingly innocuous issue, can have far-reaching implications if left unchecked. In this introduction, we delve into the significance of mold removal, not only as a measure to safeguard your health against potential allergens and toxins but also as a crucial step in maintaining the structural soundness and value of your property.
Mold removal is a journey that involves careful planning and execution. Understanding what to expect before, during, and after the mold removal process is key to ensuring its success. From preparing your home and selecting the right remediation strategy to understanding the cleanup and restoration phases, each step plays a vital role in effectively addressing mold issues.
As we transition into a detailed exploration of this process, our guide takes a comprehensive approach. We aim to equip you with the knowledge and insights needed to navigate the mold removal journey confidently. Whether you are tackling a minor mold issue or facing a significant infestation, this guide will provide you with a clear roadmap, highlighting the best practices and considerations at each stage of the process. Join us as we embark on this crucial journey to a healthier living environment and a well-maintained property.
Preparing for Mold Removal
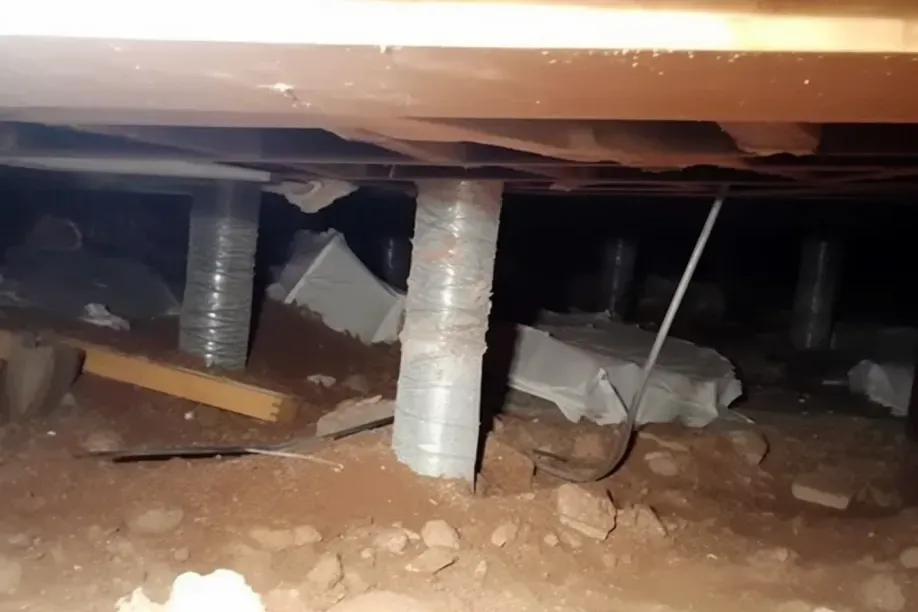
Effective mold removal begins with thorough preparation. This crucial phase involves not only identifying the presence of mold but also determining the most appropriate approach to address it. Whether you opt for a DIY method or professional intervention, understanding the scope and severity of the mold problem is key. This section provides guidance on recognizing signs of mold infestation and choosing the right mold removal approach.
Identifying the Mold Problem
Recognizing mold infestation early can significantly simplify the removal process. Here are some key signs to look for:
- Visible Growth: Look for spots or patches of mold, which can vary in color from black, green, or white to yellow or blue.
- Musty Odor: A persistent musty, earthy smell is often indicative of mold, even if it's not visible.
- Water Damage: Signs of water damage, such as stains, discoloration, or peeling paint, can suggest hidden mold growth.
- Health Symptoms: Unexplained allergic reactions like sneezing, coughing, or itchy eyes when in certain areas of your home can indicate mold presence.
- Humidity Issues: High humidity levels or condensation can lead to mold growth, especially in poorly ventilated areas.
Choosing the Right Mold Removal Approach
Deciding between a DIY approach and professional mold removal depends on several factors:
- Extent of Infestation: Small areas of mold (less than 10 square feet) can often be handled with DIY methods. Larger infestations typically require professional remediation.
- Type of Mold: Some molds, like black mold, can be toxic and are best handled by professionals.
- Location of Mold: Mold in hard-to-reach areas, like inside walls or in HVAC systems, may necessitate professional equipment and expertise.
- DIY Skills and Safety: Consider whether you have the skills, tools, and protective equipment to safely handle mold removal. If not, or if you have health concerns, professional remediation is advisable.
- Cost Considerations: While DIY can be less expensive, incorrect removal can lead to recurring problems. Professional services, though costlier, often offer more thorough and lasting solutions.
Preparing for mold removal by accurately identifying the problem and choosing the right approach is essential for effective remediation and maintaining a healthy living environment.
Safety Measures and Precautions
When dealing with mold removal, prioritizing safety is paramount. Whether you're tackling a small mold issue or preparing for a larger remediation project, understanding and implementing the right safety measures and precautions is crucial. This section focuses on the necessary Personal Protective Equipment (PPE) and the steps required to properly prepare the affected area for safe and effective mold removal.
Personal Protective Equipment (PPE)
Using the appropriate PPE is essential to protect yourself from mold spores and any chemicals used during the removal process. Here’s a list of the necessary safety gear:
- Respiratory Protection: An N-95 respirator or a more comprehensive half-face respirator is crucial to prevent the inhalation of mold spores.
- Protective Gloves: Durable, waterproof gloves (like nitrile or rubber gloves) are necessary to protect your hands from direct contact with mold and cleaning agents.
- Eye Protection: Safety goggles or glasses with side shields will protect your eyes from mold spores and any splashes of cleaning solutions.
- Protective Clothing: Wear long sleeves and pants, or better yet, a disposable coverall. Ensure that your skin is fully covered to prevent contact with mold and chemicals.
Preparing the Affected Area
Properly preparing the mold-infested area is critical to prevent the spread of mold spores to other parts of your home. Follow these steps:
- Isolate the Area: Use plastic sheeting and tape to seal off the affected area, especially if you're dealing with a significant amount of mold. This containment is crucial to prevent mold spores from dispersing.
- Remove Unnecessary Items: Clear out any non-essential items from the area to reduce the risk of contamination and to make the cleaning process easier.
- Cover and Protect Furniture: If removing furniture isn’t possible, cover it with plastic sheeting to protect it from mold spores and cleaning agents.
- Ventilation: If the area has windows, open them to allow for ventilation. However, ensure that the area is isolated from the rest of the house to prevent spores from spreading to other rooms.
- Access to Cleaning Supplies: Ensure that all necessary cleaning supplies and equipment are readily accessible before beginning the mold removal process.
By adhering to these safety measures and properly preparing the affected area, you can tackle mold removal in a way that is safe for both you and your home.
The Mold Removal Process
Tackling mold effectively requires a systematic approach that ensures complete removal and minimizes the risk of recurrence. This section provides a detailed walkthrough of the mold removal process, covering everything from the initial cleaning to the final disinfection. Additionally, we will discuss the proper handling and disposal of contaminated materials, a crucial step in maintaining a safe environment during and after the mold removal process.
Step-by-Step Mold Removal Techniques
The mold removal process involves several key steps to ensure thorough cleaning and disinfection:
- Initial Cleaning: Begin by gently cleaning the mold off the affected surfaces. For non-porous surfaces, a solution of soap and water or a mild detergent can be effective. For porous surfaces, consider using a specialized mold cleaning product.
- Applying Mold Removal Agents: After the initial cleaning, apply a mold removal agent. Options include commercial mold removers, diluted bleach solutions (one cup of bleach per gallon of water), or natural solutions like vinegar or hydrogen peroxide for less severe infestations.
- Scrubbing the Area: Use a stiff-bristle brush to scrub the area thoroughly, ensuring that you remove all visible mold. Be gentle on porous surfaces to avoid damaging the material.
- Rinsing and Drying: Rinse the area with clean water to remove any residual mold or cleaning solution. Then, dry the area completely. This step is crucial as any remaining moisture can lead to mold regrowth.
- Disinfecting the Area: After cleaning and drying, apply a disinfectant to the area to kill any remaining mold spores. This can be a commercial disinfectant or a solution like diluted bleach.
- Final Inspection: Conduct a thorough inspection to ensure all mold has been removed. Pay attention to any odors or discoloration that might indicate lingering mold.
Handling and Disposing of Contaminated Materials
Properly handling and disposing of mold-infested materials is essential to prevent the spread of mold spores:
- Identify Contaminated Materials: Materials that are heavily infested with mold and cannot be cleaned (like damaged drywall, carpeting, or insulation) should be removed.
- Containment During Removal: Seal the mold-infested materials in plastic bags before moving them through the home to prevent spreading mold spores to other areas.
- Safe Disposal: Dispose of the sealed bags according to local regulations. Some areas may require special disposal methods for mold-infested materials.
- Cleaning Tools and Equipment: Clean and disinfect any tools or equipment used during the mold removal process. This includes vacuums, brushes, and protective gear.
- Post-Removal Cleaning: After removing contaminated materials, clean and disinfect the surrounding area to ensure all mold spores have been eradicated.
By following these detailed mold removal techniques and properly handling contaminated materials, you can effectively address mold issues and maintain a healthy living environment.
Post-Removal Cleanup and Restoration
After the mold removal process, the next crucial steps are cleanup and restoration. These steps are essential not only to ensure that the area is thoroughly clean and free from any residual mold spores but also to repair and restore any damage caused by the mold. This section provides practical tips for effective cleaning and sanitizing post-mold removal, as well as guidance on how to approach the restoration of damaged areas.
Cleaning and Sanitizing the Area
Once the mold is removed, thorough cleaning and sanitizing are necessary to prevent its recurrence. Here are some tips for effective post-removal cleaning:
- HEPA Vacuuming: Use a HEPA-filter vacuum cleaner to remove any remaining mold spores from the area. This is particularly important for porous surfaces where spores can linger.
- Washing Surfaces: Clean all surfaces with a detergent solution to remove any residual mold and dirt. Pay special attention to crevices and hidden areas where mold spores might accumulate.
- Sanitizing: After cleaning, use a disinfectant to sanitize the area. This can be a commercial disinfectant or a solution like diluted bleach. Ensure that the disinfectant is safe for the surfaces being treated.
- Air Purification: Consider using an air purifier with a HEPA filter to capture any airborne mold spores that might still be present in the room.
- Drying: Ensure that the area is completely dry after cleaning and sanitizing. Use fans or dehumidifiers to aid in the drying process.
- Disposal of Cleaning Materials: Safely dispose of any rags, sponges, or brushes used in the cleaning process to avoid spreading mold spores to other areas.
Restoring Damaged Areas
Mold can cause significant damage to various materials and surfaces. Here’s how to approach the restoration:
- Assessing Damage: Evaluate the extent of the damage caused by mold. This includes checking for structural damage, especially in cases of long-term mold growth.
- Repairing Structural Elements: For structural damage, such as weakened wood or corroded materials, consult with a professional to ensure proper repair or replacement.
- Restoring Surfaces: Paint or refinish surfaces as needed once they are thoroughly cleaned and dry. Use mold-resistant paint where appropriate.
- Replacing Materials: In some cases, materials like drywall, carpet, or insulation might need to be completely replaced if they were heavily infested with mold.
- Preventative Measures: Finally, implement preventative measures to avoid future mold growth. This might include improving ventilation, fixing leaks, or using dehumidifiers.
By following these steps for post-removal cleanup and restoration, you can ensure that your space is not only clean and free of mold but also restored to its original condition, or even improved to prevent future mold issues.
Before and After: Assessing the Results
The effectiveness of a mold removal process is not just about the immediate visual changes; it also significantly impacts the health and air quality of your living space. Post-removal assessment is crucial to ensure that the mold has been thoroughly eradicated and that the environment is safe for occupants. This section focuses on evaluating the visual and health impact post-mold removal and discusses methods to verify the completeness of the mold removal process.
Visual and Health Impact
Assessing the visual and health impact of mold removal involves a comparison of the affected area and air quality before and after the process:
- Visual Inspection: Compare the appearance of the affected area before and after mold removal. Look for any visible signs of mold, water damage, or discoloration that might indicate lingering issues.
- Air Quality Assessment: Evaluate changes in air quality, particularly if the mold issue was extensive. Notice any differences in odors or improvements in respiratory issues or allergic reactions among the occupants.
- Health Feedback: Collect feedback from residents regarding any changes in health symptoms related to mold exposure, such as allergies, asthma, or other respiratory issues.
Ensuring Complete Mold Removal
Verifying the thoroughness of the mold removal process is essential to prevent recurrence:
- Follow-Up Inspection: Conduct a detailed inspection of the previously affected areas. Pay special attention to hidden spots and areas that are prone to moisture accumulation.
- Moisture Testing: Use a moisture meter to ensure that the previously affected areas are completely dry. Mold is likely to recur if there is still moisture present.
- Professional Testing: In cases of severe infestations, consider hiring a professional to conduct a post-removal inspection and testing. This may include air sampling to detect the presence of mold spores.
- Ongoing Monitoring: Regularly monitor the area over time, especially during humid seasons or after heavy rains, to ensure that there are no signs of mold returning.
- Preventative Measures: Implement preventative measures such as improving ventilation, fixing leaks, and using dehumidifiers to maintain a mold-free environment.
By thoroughly assessing both the visual and health impacts and ensuring the completeness of the mold removal process, you can confidently maintain a healthy and safe living environment, free from the risks associated with mold.
FAQs
Contact Bull City Crawlspace Today!
Bull City Crawlspace will do everything we can to ensure your experience with us is excellent.
Request A FREE Estimate
Request a Free Estimate Form
Checkout Recent Post


Got a Question? We’re Here to Help.
You can arrange an appointment or make an enquiry by phone or email, orget in touch to us via our contact form.
Business Hours:
Monday - Friday 8:00 AM - 8:00 PM Saturday and Sunday: Closed
We're your local family owned, operated and licensed crawl space repair and waterproofing company.
919-724-4601
jon@bullcitycrawlspace.com
Services
NATIONWIDE LEADER
Claim you free crawl space consultation today by clicking the button below.
Contact Info
Business Hours:
Mon to Fri: 8:00am - 8:00pm