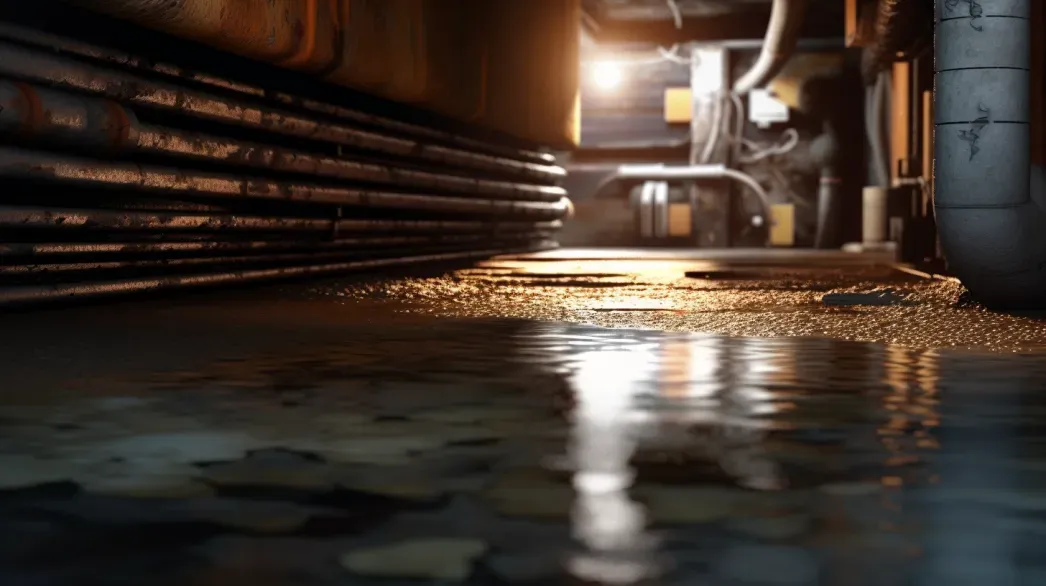
Crawl spaces, often overlooked, play a crucial role in the overall health and stability of a building. These confined areas between the ground and the first floor can be vulnerable to moisture accumulation, leading to a host of issues if not properly managed. Installing moisture barriers in crawl spaces is essential for preventing moisture-related problems that can compromise the structural integrity of a building and affect the indoor air quality.
Moisture barriers, also known as vapor barriers, are designed to block the passage of water vapor from the ground into the crawl space. Without these barriers, moisture can seep into the foundation and wooden structures, leading to mold growth, wood rot, and increased humidity levels inside the home. These conditions not only damage the building materials but also create an unhealthy living environment, potentially causing respiratory issues and allergies for occupants.
By installing a moisture barrier in the crawl space, you can significantly reduce the risk of these problems. A properly installed barrier helps maintain a dry and stable environment, protecting the foundation and supporting the durability of the building. Additionally, it can enhance energy efficiency by reducing the load on heating and cooling systems, as moisture control helps maintain consistent indoor temperatures.
This blog will delve into the importance of moisture barriers in crawl spaces, exploring the benefits they offer and the best practices for their installation. Understanding the critical role these barriers play can help homeowners and builders make informed decisions to safeguard their properties against moisture-related damage, ensuring a healthy and long-lasting structure.
Preparation
Assessing the Crawl Space
Identifying Signs of Moisture Issues Before installing a moisture barrier, it's crucial to thoroughly assess the crawl space for any existing moisture problems. Key indicators of moisture issues include:
- Dampness, Mold, and Mildew: Look for visible signs of mold or mildew on walls, floors, and wooden structures. Damp or wet areas on the ground or walls are also clear indicators of moisture infiltration.
- Musty Odors: A persistent musty smell often signifies mold growth or high humidity levels, both of which need to be addressed before barrier installation.
- Visible Water Stains: Check for water stains on walls, floors, and joists. These stains can indicate past or ongoing water intrusion that must be rectified to ensure the effectiveness of the moisture barrier.
Measuring the Area to Determine the Amount of Material Needed Accurate measurements are essential to determine the amount of moisture barrier material required. Use a tape measure to calculate the length and width of the crawl space. Be sure to account for any irregularities or obstructions within the space. It’s advisable to add an extra margin to your measurements to ensure complete coverage and allow for overlaps and adjustments during installation.
Gathering Tools and Materials
Essential Tools To efficiently install a moisture barrier, gather the following essential tools:
- Tape Measure: For accurate measurements of the crawl space dimensions.
- Utility Knife or Heavy-Duty Scissors: For cutting the moisture barrier material to the correct size and shape.
- Staple Gun: To secure the barrier to wooden structures within the crawl space.
- Caulking Gun: For applying sealant or caulk along seams and edges to ensure a tight seal.
Required Materials Ensure you have the necessary materials before starting the installation:
- Polyethylene Sheeting (Moisture Barrier): The primary material for creating the moisture barrier. Choose a thickness suitable for your specific needs.
- Sealant or Caulk: Used to seal seams and edges, preventing moisture from seeping through gaps.
- Adhesive Tape: For securing overlaps and ensuring a continuous barrier.
Safety Precautions
Personal Protective Equipment (PPE) Safety is paramount when working in crawl spaces. Wear the appropriate personal protective equipment to protect yourself from dust, debris, and potential allergens or contaminants:
- Gloves: To protect your hands from sharp edges, splinters, and irritants.
- Safety Glasses: To shield your eyes from dust, dirt, and any chemical sealants or adhesives used during the installation.
- Dust Masks: To prevent inhalation of dust, mold spores, and other airborne particles that may be present in the crawl space.
Ensuring Proper Ventilation in the Crawl Space Proper ventilation is crucial while working in confined spaces like crawl spaces. Ensure there is adequate airflow to minimize the accumulation of dust and fumes from sealants or adhesives. If natural ventilation is insufficient, use portable fans or ventilation equipment to improve air circulation. This not only provides a safer working environment but also helps in the drying process of any applied sealants.
By thoroughly assessing the crawl space, accurately measuring and gathering the necessary tools and materials, and adhering to safety precautions, you can effectively prepare for the installation of a moisture barrier. These steps are essential for ensuring a successful installation that will protect your crawl space from moisture-related issues.
Step 1: Clean and Prepare the Crawl Space
Removing Debris and Moisture
Clearing Out Debris, Dirt, and Old Insulation The first step in preparing your crawl space for a moisture barrier installation is to clear out all debris, dirt, and old insulation. This includes removing any trash, leaves, or other organic matter that may have accumulated over time. Old, damp insulation should also be removed, as it can harbor mold and mildew, contributing to ongoing moisture issues. Use a sturdy broom, dustpan, and heavy-duty garbage bags to collect and dispose of this debris properly.
Using Dehumidifiers and Fans to Dry the Area Once the debris is cleared, it's essential to dry out the crawl space completely. Set up dehumidifiers to reduce humidity levels and use fans to circulate air throughout the space. This helps to expedite the drying process and ensure that the area is moisture-free before installing the barrier. Aim to achieve a humidity level below 50%, as this will prevent mold growth and create an optimal environment for the moisture barrier installation.
Addressing Any Leaks or Sources of Water Intrusion Identifying and addressing any leaks or sources of water intrusion is crucial before proceeding with the installation. Inspect the crawl space for any signs of water entry, such as wet spots, dripping water, or standing water. Common sources include plumbing leaks, groundwater seepage, and poor drainage. Repair any leaks and improve drainage around the foundation to prevent future water intrusion. This may involve fixing plumbing issues, grading the soil away from the foundation, or installing a sump pump if necessary.
Repairing and Smoothing the Surface
Fixing Cracks and Holes in the Foundation Before installing the moisture barrier, ensure that the foundation walls and floor are in good condition. Inspect the foundation for cracks, holes, or any other damage. Use a suitable patching compound to fill and seal any cracks or holes. This step is vital to prevent water from seeping through the foundation and compromising the effectiveness of the moisture barrier. Allow the patching compound to dry completely according to the manufacturer's instructions before proceeding.
Leveling the Ground if Necessary A smooth, level surface is essential for the proper installation of a moisture barrier. Uneven ground can create gaps and voids that reduce the barrier’s effectiveness. If the ground in your crawl space is uneven, consider leveling it before installing the barrier. This may involve adding or removing soil and compacting it to create a stable, flat surface. In some cases, a thin layer of sand or gravel can be used to achieve a smooth base.
By thoroughly cleaning and preparing the crawl space, you lay the groundwork for a successful moisture barrier installation. These preparation steps ensure that the barrier can be installed on a clean, dry, and smooth surface, maximizing its effectiveness in protecting your crawl space from moisture intrusion.
Step 2: Measure and Cut the Moisture Barrier
Measuring the Crawl Space
Measuring the Width and Length of the Area Accurate measurement is a critical step in ensuring that your moisture barrier fits perfectly and provides complete coverage. Start by measuring the width and length of the crawl space. Use a reliable tape measure to capture these dimensions, noting any irregularities or obstacles that may affect the installation. Measure the width from one side to the other, and then measure the length from the front to the back of the crawl space. Record these measurements carefully.
Allowing Extra Material for Overlaps and Seams To ensure a secure and continuous barrier, it is important to allow extra material for overlaps and seams. Add at least 6 to 12 inches to each measurement to accommodate these overlaps. This additional material ensures that each piece of the barrier can be overlapped with the adjacent pieces, creating a seamless and effective moisture barrier. Proper overlapping is essential to prevent any gaps that could allow moisture to penetrate.
Cutting the Barrier
Using a Utility Knife or Heavy-Duty Scissors Cutting the moisture barrier to the correct size and shape is the next crucial step. Depending on the material of your barrier, you can use a utility knife or heavy-duty scissors. Ensure that your cutting tools are sharp to achieve clean, precise cuts without tearing the material.
Cutting Pieces to Fit the Dimensions of the Crawl Space Using the measurements you recorded, lay out the moisture barrier material on a flat surface. Mark the dimensions with a pencil or chalk, including the additional inches for overlaps. Carefully cut the barrier along the marked lines:
- Utility Knife: For thicker or more rigid barrier materials, use a utility knife. Place a straightedge or ruler along the marked line to guide the knife, ensuring a straight cut. Press firmly but carefully to avoid damaging the underlying surface.
- Heavy-Duty Scissors: For more flexible materials, heavy-duty scissors can be used. Cut along the marked lines, ensuring smooth and even edges.
Cut the barrier into manageable pieces that fit the dimensions of your crawl space.
Remember to include extra material for overlapping edges and seams. Each piece should be cut precisely to ensure they fit together without gaps, providing continuous coverage.
By accurately measuring and carefully cutting the moisture barrier, you can ensure that each piece fits perfectly in your crawl space. This step is vital for creating a comprehensive and effective moisture barrier that protects your home from moisture-related issues. Proper preparation and precision in cutting will facilitate a smoother installation process, enhancing the overall effectiveness of the moisture barrier.
Step 3: Install the Moisture Barrier on the Floor
Laying Out the Barrier
Rolling Out the Polyethylene Sheeting Across the Crawl Space Floor Begin by rolling out the polyethylene sheeting across the crawl space floor. Start at one end of the crawl space and unroll the sheeting slowly, ensuring it covers the entire area. If your crawl space is large, work in sections to maintain control over the sheeting and ensure even coverage. Align the edges of the sheeting with the walls of the crawl space, making sure to leave enough material to extend up the walls slightly for better moisture protection.
Ensuring the Barrier Lays Flat Without Wrinkles or Bubbles As you unroll the sheeting, make sure it lays flat against the ground. Use your hands or a floor roller to smooth out any wrinkles or bubbles that may form. These imperfections can create gaps where moisture could seep through, so it’s essential to eliminate them during the installation process. For large sections, have an assistant help you keep the sheeting taut and smooth.
Securing the Floor Barrier
Using a Staple Gun to Attach the Barrier to the Ground if Needed In some cases, it may be necessary to secure the polyethylene sheeting to the ground to prevent it from shifting. If your crawl space has a dirt or gravel floor, use a staple gun to attach the barrier to the ground. Space the staples approximately 12 to 18 inches apart around the perimeter and at seams. Ensure the staples penetrate the sheeting securely without tearing the material.
Applying Adhesive Tape to Secure Seams and Overlaps For seams and overlaps, use adhesive tape designed for polyethylene sheeting to ensure a tight, moisture-resistant bond. Overlap the edges of the sheeting by at least 6 to 12 inches. Apply the tape along the seam, pressing it firmly to ensure full adhesion. Smooth out the tape to remove any air bubbles, creating a seamless connection between the overlapping sections.
Sealing the Edges
Applying Caulk or Sealant Around the Perimeter of the Barrier To create a comprehensive moisture barrier, apply caulk or sealant around the perimeter of the barrier. This step is crucial for preventing moisture from seeping under the edges of the sheeting and into the crawl space. Choose a high-quality sealant suitable for use with polyethylene sheeting and capable of withstanding the environmental conditions of the crawl space.
Ensuring a Tight Seal to Prevent Moisture Seepage Run a continuous bead of sealant along the edges where the barrier meets the walls and any other vertical surfaces. Use a caulking tool or your finger to smooth out the sealant, ensuring it fills any gaps and adheres well to both the sheeting and the wall. Pay special attention to corners and joints, where moisture is most likely to penetrate. Allow the sealant to cure completely according to the manufacturer’s instructions before proceeding to the next steps of your project.
By carefully laying out, securing, and sealing the moisture barrier on the floor of your crawl space, you create an effective defense against moisture infiltration. These steps are critical for ensuring the longevity and effectiveness of the barrier, helping to protect your home from the damaging effects of moisture. Proper installation techniques will provide a dry, healthy environment in your crawl space, contributing to the overall durability and comfort of your home.
Step 4: Install the Moisture Barrier on the Walls
Positioning the Barrier
Starting from the Bottom of the Walls and Working Upwards When installing the moisture barrier on the walls of your crawl space, it is essential to start from the bottom and work your way up. Begin by positioning the bottom edge of the polyethylene sheeting at the base of the wall, ensuring that it overlaps slightly with the floor barrier to create a continuous moisture barrier. This method helps to direct any moisture downward and away from the wall surfaces.
Gradually unroll or unfold the sheeting upwards, smoothing it against the wall as you go.
Ensuring Even Placement and Full Coverage As you position the moisture barrier, make sure it covers the entire height of the wall, extending to the top where the wall meets the floor above. Ensure the barrier is placed evenly, without any wrinkles or gaps. Use a level to check that the barrier is straight and correctly aligned. Adjust as necessary to maintain even placement, which is crucial for effective moisture protection.
Securing the Wall Barrier
Using a Staple Gun to Attach the Barrier to the Walls Secure the moisture barrier to the walls using a staple gun. Start at the bottom and work your way up, ensuring the barrier remains taut and smooth against the wall surface. Use staples to fasten the sheeting at the top, bottom, and along the sides.
Placing Staples at Regular Intervals for Secure Attachment To ensure the barrier is securely attached, place staples at regular intervals, approximately 12 to 18 inches apart. This spacing provides adequate support without risking damage to the sheeting. Make sure each staple penetrates the barrier firmly without tearing it. Pay extra attention to the edges and corners, where additional staples may be needed to maintain a secure fit.
Sealing Seams and Edges
Applying Caulk or Sealant Along Seams and Edges After securing the moisture barrier with staples, it is essential to seal all seams and edges to prevent moisture from seeping through. Apply a high-quality caulk or sealant along the seams where sections of the barrier overlap. This step ensures a watertight seal that enhances the effectiveness of the moisture barrier.
Technique: Run a continuous bead of sealant along each seam, ensuring it fills any gaps. Use a caulking tool or your finger to smooth out the sealant, pressing it into the seam to ensure complete coverage.
Using Tape to Secure Overlaps In addition to caulking, use adhesive tape designed for moisture barriers to secure the overlaps. This tape adds an extra layer of protection and ensures that the seams remain tightly sealed.
Technique: Apply the tape along the overlap, pressing it firmly to ensure it adheres well to both sections of the barrier. Smooth out any wrinkles or bubbles to create a flat, seamless bond.
By following these steps to position, secure, and seal the moisture barrier on the walls, you ensure a comprehensive and effective moisture protection system for your crawl space.
Proper installation techniques are crucial for maintaining a dry, healthy environment in your home, preventing moisture-related issues such as mold growth and structural damage. This meticulous approach to installing the wall barrier complements the floor barrier, creating a continuous shield against moisture infiltration.
FAQs
Contact Bull City Crawlspace Today!
Bull City Crawlspace will do everything we can to ensure your experience with us is excellent.
Request A FREE Estimate
Request a Free Estimate Form
Checkout Recent Post


Got a Question? We’re Here to Help.
You can arrange an appointment or make an enquiry by phone or email, orget in touch to us via our contact form.