Mon-Fri: 8am to 8pm
304 Trail One Burlington NC 27215
jon@bullcitycrawlspace.com
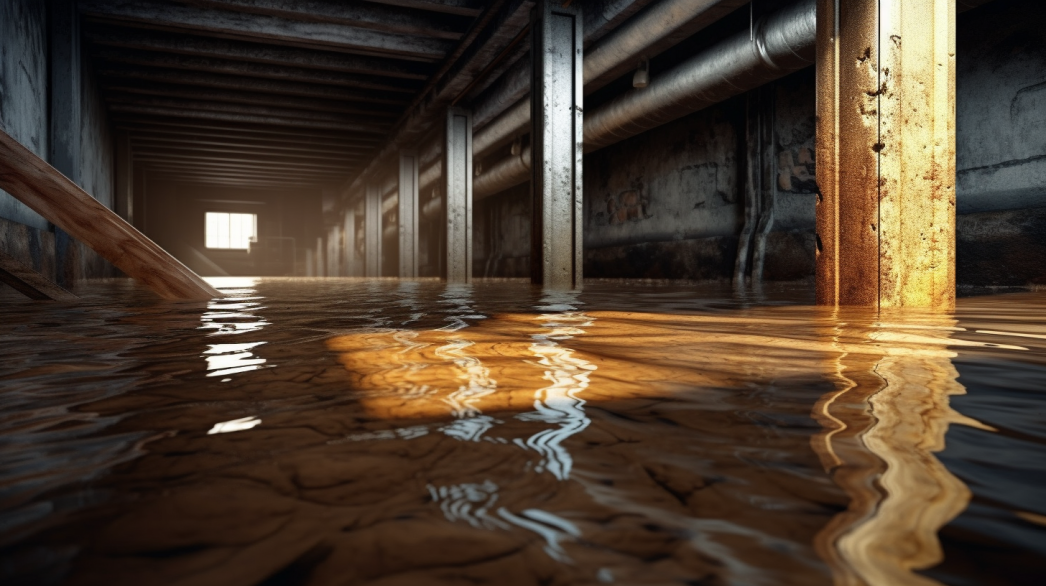
Garages are versatile spaces that serve various functions, from housing vehicles and storing tools to acting as workshops or hobby areas. However, garages are particularly susceptible to moisture-related issues due to their direct exposure to outdoor elements and frequent temperature fluctuations. Effective moisture control in garages is essential for maintaining the structural integrity of the space, protecting stored items, and ensuring a safe and comfortable environment.
Moisture can enter garages through various pathways, such as the floor, walls, and roof, leading to problems like mold growth, corrosion, and damage to both the building materials and the contents stored within. Excessive moisture can also contribute to unpleasant odors, reduce indoor air quality, and create hazardous conditions, such as slippery floors.
Implementing effective moisture control measures can mitigate these risks, preserving the value and functionality of your garage. This blog post will explore
the importance of moisture control in garages, highlighting the potential consequences of neglecting this crucial aspect and offering practical strategies for managing moisture effectively. By understanding and addressing moisture issues, homeowners can ensure that their garages remain dry, durable, and ready to meet their diverse needs.
Understanding Moisture Barriers
Moisture barriers are a crucial component in protecting garages from the damaging effects of water and humidity. By understanding what moisture barriers are and their benefits, homeowners can ensure that their garages remain dry and functional.
What is a Moisture Barrier?
Definition and Primary Function of a Moisture Barrier
A moisture barrier, also known as a vapor barrier, is a material used to prevent the passage of water vapor and liquid moisture through building surfaces such as floors, walls, and ceilings. Its primary function is to protect structures from moisture-related damage by blocking water from penetrating materials that are susceptible to decay and degradation.
In garages, moisture barriers are essential for managing the impact of moisture that can seep in from the ground or through exterior walls. By creating a protective layer, moisture barriers help maintain the integrity of the building and the condition of stored items.
Common Materials Used for Moisture Barriers
Various materials are commonly used as moisture barriers, each offering specific advantages depending on the application and environment:
- Plastic Sheeting: Polyethylene plastic sheeting is a popular choice for moisture barriers due to its flexibility, durability, and cost-effectiveness. It is widely used in flooring and wall applications to block moisture from entering the space.
- Liquid Membranes: Liquid-applied membranes are coatings that cure to form a seamless, waterproof barrier. They are particularly useful for irregular surfaces and can be applied to floors and walls to provide comprehensive moisture protection.
- Asphalt Felt: Used traditionally in roofing, asphalt felt can also serve as a moisture barrier in garages, providing a layer of protection against water infiltration.
Benefits of Installing a Moisture Barrier in a Garage
Prevention of Mold and Mildew Growth
One of the most significant benefits of installing a moisture barrier in a garage is the prevention of mold and mildew growth. Garages are often subject to fluctuating temperatures and humidity levels, creating conditions conducive to mold development:
- Moisture Control: A moisture barrier prevents moisture from accumulating in the garage, reducing the risk of mold and mildew, which thrive in damp environments. This helps maintain a healthy indoor environment and protects against the health hazards associated with mold exposure.
- Odor Reduction: By preventing mold growth, moisture barriers also help eliminate musty odors commonly associated with damp garages, ensuring a fresher and more pleasant space.
Protection of Stored Items and Structural Elements
Garages often house valuable items, from vehicles and tools to seasonal decorations and equipment. Moisture barriers provide critical protection for these stored items:
- Item Preservation: By blocking moisture, barriers help prevent rust, corrosion, and decay of metal, wood, and other materials, preserving the condition and lifespan of stored items.
- Structural Integrity: Moisture barriers protect the structural elements of the garage, such as the concrete slab, walls, and roof, from water damage. This helps prevent issues like cracking, spalling, and weakening of materials, ensuring the garage remains safe and sound.
Enhancement of Overall Garage Durability
Installing a moisture barrier contributes to the long-term durability and functionality of a garage:
- Extended Lifespan: By protecting against moisture-related damage, moisture barriers help extend the life of building materials and reduce the need for costly repairs or replacements.
- Improved Comfort and Utility: A dry garage is more comfortable and versatile, allowing it to be used for a variety of purposes, from storage and vehicle parking to workshops and hobby spaces.
In conclusion, moisture barriers are essential for maintaining the condition and utility of garages. By preventing mold growth, protecting stored items, and enhancing structural durability, moisture barriers play a vital role in ensuring that garages remain safe, functional, and valuable components of any property.
Preparing for Installation
Assessing the Garage Environment
Identifying Existing Moisture Issues
Before installing a moisture barrier, it is essential to evaluate the current state of the garage to identify any existing moisture problems:
- Visual Inspection: Look for visible signs of moisture damage, such as water stains, mold growth, or efflorescence (white powdery deposits) on walls and floors. These indicators suggest that moisture is penetrating the garage and requires remediation before installing a barrier.
- Moisture Testing: Use a moisture meter to assess the moisture content of the garage’s concrete floor and walls. Elevated moisture levels indicate a potential problem that needs to be addressed. This testing will help determine whether additional drainage or waterproofing measures are needed.
- Addressing Sources of Moisture: Identify and rectify the sources of moisture intrusion, such as leaks, poor drainage, or inadequate ventilation. Ensuring that these issues are resolved before installing the moisture barrier is crucial to its effectiveness.
Importance of a Clean and Dry Surface
Preparing the garage surfaces is vital for the proper adhesion and performance of the moisture barrier:
- Cleaning: Thoroughly clean the garage floor and walls to remove dust, dirt, oil stains, and any other debris. Use a broom, vacuum, or power washer for best results. Any residue left on the surface can interfere with the bond between the barrier and the substrate.
- Drying: Ensure that all surfaces are completely dry before installation. Moisture trapped under the barrier can lead to mold growth and reduce the effectiveness of the barrier. Use fans or dehumidifiers to speed up the drying process if necessary.
Selecting the Right Moisture Barrier
Types of Moisture Barriers Suitable for Garages
Choosing the right moisture barrier is essential for providing effective protection in garage environments:
- Plastic Sheeting: Polyethylene plastic sheeting is a popular choice for garages due to its durability, flexibility, and ease of installation. It is effective at preventing moisture from rising through concrete floors.
- Liquid Membranes: Liquid-applied membranes offer a seamless solution, curing to form a continuous barrier. They are ideal for uneven surfaces and provide excellent adhesion to a variety of substrates.
- Rubberized Asphalt: This type of barrier provides strong adhesion and is particularly suitable for areas with high moisture exposure. It is often used in combination with other moisture control measures for added protection.
Considerations for Choosing the Appropriate Thickness and Material
Several factors should be considered when selecting the right moisture barrier for a garage:
- Climate and Moisture Levels: Consider the local climate and expected moisture levels in the garage. In high-moisture environments, thicker barriers or those with higher permeability ratings may be necessary to ensure adequate protection.
- Compatibility with Substrate: Ensure that the chosen moisture barrier is compatible with the garage’s substrate, whether it’s concrete, wood, or metal. This will ensure proper adhesion and performance.
- Installation Method: Consider the ease of installation for each type of barrier. Some materials, such as liquid membranes, require specific application techniques, while others, like plastic sheeting, are more straightforward to install.
- Durability and Longevity: Choose a moisture barrier that offers long-lasting protection and can withstand the rigors of the garage environment. Consider factors such as resistance to wear, tear, and chemical exposure.
In conclusion, preparing for the installation of a moisture barrier in a garage involves assessing the environment for existing moisture issues and selecting the right barrier for the job. By ensuring a clean and dry surface and choosing materials suited to the specific conditions of the garage, homeowners can protect their space from moisture-related damage and enhance its durability and functionality.
Tools and Materials Needed
Proper installation of a moisture barrier in your garage requires the right tools and materials. Being well-prepared not only ensures a smooth installation process but also enhances the effectiveness and longevity of the moisture barrier.
Essential Tools
Utility Knife
A utility knife is a crucial tool for cutting moisture barrier materials to fit the dimensions of your garage. Its sharp blade allows for precise cuts, ensuring that the barrier fits snugly around corners and edges, providing comprehensive coverage. Keep extra blades on hand, as cutting through thick materials can dull the blade over time.
Tape Measure
Accurate measurements are vital for a successful moisture barrier installation. A tape measure helps you determine the exact dimensions of the area to be covered, allowing you to cut the moisture barrier material accurately. Measure the length and width of the floor and walls, including any protrusions or recesses, to ensure complete coverage.
Stapler or Adhesive Tape
A stapler or adhesive tape is necessary for securing the moisture barrier in place during installation:
- Stapler: Ideal for attaching the barrier to wooden surfaces, such as wall studs or wooden flooring. Ensure that the staples are corrosion-resistant and designed for construction use.
- Adhesive Tape: Use high-quality adhesive tape to secure seams and edges. This is particularly useful for securing plastic sheeting or other barrier materials to non-wooden surfaces. Choose a tape that is specifically designed for moisture barriers to ensure a strong, watertight seal.
Safety Equipment (Gloves, Mask)
Safety equipment is essential for protecting yourself during the installation process:
- Gloves: Wear gloves to protect your hands from cuts and abrasions while handling sharp tools and materials. They also provide protection against any chemicals or irritants in the barrier materials.
- Mask: Use a mask to prevent inhaling dust, particles, and fumes that may be generated during cutting and installation. This is especially important in enclosed garage spaces where ventilation may be limited.
Required Materials
Moisture Barrier Material
Selecting the right moisture barrier material is crucial for effective moisture control in your garage:
- Plastic Sheeting: Polyethylene sheeting is a popular choice for its durability, flexibility, and ease of installation. It provides excellent protection against moisture seeping through the floor and walls.
- Liquid Membranes: Consider using liquid-applied membranes for seamless coverage on irregular surfaces. They cure to form a continuous barrier that adheres well to a variety of substrates.
Sealing Tape or Adhesive
Sealing tape or adhesive is used to secure seams and edges of the moisture barrier material:
- Sealing Tape: Use waterproof sealing tape to secure the overlaps in the barrier material. This ensures that no moisture can penetrate through the seams.
- Adhesive: For liquid membranes or more complex installations, an adhesive may be used to bond the barrier material to the substrate. Choose an adhesive that is compatible with both the barrier material and the surface it will be applied to.
Cleaning Supplies (Broom, Vacuum)
Cleaning supplies are necessary for preparing the garage surfaces before installation:
- Broom: Sweep the floor to remove loose debris, dirt, and dust. This ensures that the surface is clean and ready for the moisture barrier installation.
- Vacuum: Use a vacuum to remove finer particles and dust from the floor and walls. This helps create a clean, dry surface for optimal adhesion of the moisture barrier.
In conclusion, having the right tools and materials on hand is essential for a successful moisture barrier installation in your garage. By preparing thoroughly and using high-quality equipment, you can ensure that your garage is well-protected against moisture-related issues, enhancing its durability and functionality for years to come.
Step-by-Step Installation Process
Step 1 - Surface Preparation
Cleaning the Garage Floor and Walls Thoroughly
Proper surface preparation is crucial for the successful installation of a moisture barrier. Begin by thoroughly cleaning the garage floor and walls:
- Remove Debris: Sweep the floor to remove any loose dirt, dust, and debris. Use a broom to reach corners and edges where debris tends to accumulate.
- Degrease and Wash: If there are any oil stains or residues on the floor, use a degreaser to clean the surface. Follow up with a mild detergent solution and scrub the floor and walls with a stiff brush to remove any stubborn dirt or grime.
- Rinse and Dry: Rinse the surfaces with clean water and allow them to dry completely. Use fans or a dehumidifier to speed up the drying process, ensuring that no moisture is trapped under the barrier during installation.
Ensuring the Surface is Dry and Free of Debris
Once cleaned, ensure that the surface is completely dry and free of any remaining debris:
- Final Inspection: Conduct a final inspection to check for any remaining dust or particles. Use a vacuum to remove any remaining fine debris, particularly in corners and around fixtures.
- Moisture Check: Use a moisture meter to verify that the moisture levels in the concrete floor and walls are within acceptable limits. This step is crucial to prevent trapping moisture under the barrier, which could lead to mold growth and damage.
Step 2 - Measuring and Cutting the Moisture Barrier
Measuring the Dimensions of the Garage Floor and Walls
Accurate measurements are essential for cutting the moisture barrier to fit the space properly:
- Floor Dimensions: Measure the length and width of the garage floor, including any irregularities or protrusions. Be sure to account for any steps or ramps that may require coverage.
- Wall Dimensions: Measure the height and width of each wall where the barrier will be installed. Note any openings such as windows, doors, and vents that will require special attention.
Cutting the Moisture Barrier to Fit These Dimensions
With accurate measurements, cut the moisture barrier to fit the garage dimensions:
- Use a Utility Knife: Lay the moisture barrier material flat on a clean surface and use a utility knife to cut it to size. Allow for at least a 6-inch overlap on the edges to ensure a complete seal.
- Cut Openings: For windows, doors, and other openings, cut the barrier slightly larger than the actual size of the opening to allow for sealing around the edges.
Step 3 - Installing the Moisture Barrier on the Floor
Laying the Moisture Barrier Smoothly Across the Floor
Begin the installation by laying the moisture barrier across the garage floor:
- Position the Barrier: Start at one end of the garage and unroll the moisture barrier across the floor, ensuring it lies flat and smooth. Remove any wrinkles or air bubbles as you go to prevent gaps that could allow moisture through.
- Align the Edges: Align the edges of the barrier with the walls, allowing the excess material to extend up the walls slightly. This helps create a more comprehensive seal when installing the wall barrier.
Overlapping Edges by at Least 6 Inches and Securing Seams with Tape
Ensure that the seams between sections of the moisture barrier are properly overlapped and sealed:
- Overlap Seams: Overlap the edges of each section by at least 6 inches. This overlap is critical for preventing moisture from seeping through the seams.
- Secure with Tape: Use high-quality adhesive tape designed for moisture barriers to secure the overlapped seams. Press the tape firmly to ensure a tight seal, which will help maintain the barrier’s integrity over time.
Step 4 - Installing the Moisture Barrier on the Walls
Attaching the Moisture Barrier to the Walls with a Stapler or Adhesive
Once the floor barrier is in place, proceed with installing the barrier on the walls:
- Position the Barrier: Begin at the bottom of the wall and unroll the barrier upward, smoothing it out as you go to prevent wrinkles or gaps.
- Attach the Barrier: Use a construction stapler to attach the barrier to wooden surfaces, such as wall studs. For non-wood surfaces, use an appropriate adhesive to secure the barrier in place, ensuring it adheres firmly to the wall.
Ensuring a Tight Seal Around Windows, Doors, and Other Openings
Carefully seal around all openings to prevent moisture ingress:
- Cut and Seal: Cut the barrier to fit around windows, doors, and vents, leaving enough excess material to overlap the edges. Use adhesive tape to seal the barrier tightly around each opening.
- Inspect and Secure: After installing the barrier, inspect all seams and edges to ensure a complete and secure seal. Reinforce any areas that may need additional support to prevent moisture from entering.
In conclusion, following these detailed steps for installing a moisture barrier in your garage will help protect the space from moisture-related issues. Proper preparation, accurate measurements, and careful installation are key to achieving long-lasting protection and maintaining the functionality and integrity of your garage.
Tips for a Successful Installation
Installing a moisture barrier in your garage requires careful attention to detail to ensure it functions effectively in protecting against moisture intrusion. Here are some expert tips to help you achieve a successful installation that provides long-lasting protection and enhances the durability of your garage.
Ensuring a Proper Seal
Techniques for Overlapping Seams Effectively
Creating a proper seal is crucial for preventing moisture from penetrating the barrier. Here are techniques to ensure seams are effectively overlapped and sealed:
- Consistent Overlap: Always overlap seams by at least 6 inches to ensure a continuous barrier that blocks moisture. This overlap helps prevent water from seeping through gaps where sections meet.
- Use High-Quality Tape: Secure overlapped seams with high-quality, waterproof adhesive tape specifically designed for moisture barriers. Apply the tape evenly along the entire seam, pressing it firmly to ensure a tight bond and eliminate air pockets.
- Double Check Seams: After taping, double-check each seam to ensure there are no loose edges or gaps. Reinforce any areas that appear vulnerable with additional tape to ensure a complete seal.
Special Attention to Corners and Edges
Corners and edges are particularly susceptible to moisture infiltration and require special attention during installation:
- Pre-Cut Barrier Material: Pre-cut sections of the barrier material to fit snugly into corners and around edges. This minimizes the need for on-the-spot adjustments and ensures a precise fit.
- Extra Sealant: Use extra tape or sealant in corners and along edges to reinforce these areas. Applying a generous amount of adhesive helps ensure that the barrier remains secure and watertight.
- Inspect Thoroughly: Carefully inspect corners and edges after installation to verify that they are fully sealed. Address any gaps or loose areas immediately to prevent moisture ingress.
Handling Complex Areas
Sealing Around Garage Fixtures and Outlets
Garages often have fixtures and outlets that can complicate moisture barrier installation. Here’s how to effectively seal around these areas:
- Cut Precise Openings: When installing the barrier around outlets and fixtures, cut precise openings that are slightly smaller than the actual size of the fixture. This allows the barrier to form a tight seal around the edges.
- Use Pre-Formed Collars: Consider using pre-formed collars or gaskets around pipes and outlets to create a snug fit and enhance sealing. These products are designed to work with barriers to prevent leaks and drafts.
- Apply Sealant: Use a flexible sealant to fill any gaps between the barrier and fixtures. This helps create a continuous, watertight seal that protects against moisture intrusion.
Working with Irregular Shapes and Surfaces
Garages often have irregular shapes and surfaces that require special consideration during installation:
- Flexible Materials: Use moisture barrier materials that are flexible enough to conform to uneven surfaces. Liquid-applied membranes are particularly effective in these situations, as they can be brushed or rolled on to create a seamless, custom fit.
- Custom Fitting: Take the time to measure and cut the barrier material accurately to accommodate irregularities. Custom fitting ensures complete coverage and minimizes the risk of gaps.
- Secure All Edges: Pay close attention to securing all edges, especially around irregular surfaces. Use additional tape or adhesive as needed to ensure a tight seal and prevent any movement of the barrier.
In conclusion, achieving a successful moisture barrier installation in your garage requires attention to detail and careful handling of seams, corners, and complex areas. By following these tips and techniques, you can ensure a watertight seal that protects your garage from moisture-related issues and enhances its durability and functionality.
FAQs
Contact Bull City Crawlspace Today!
Bull City Crawlspace will do everything we can to ensure your experience with us is excellent.
Request A FREE Estimate
Request a Free Estimate Form
Checkout Recent Post


Got a Question? We’re Here to Help.
You can arrange an appointment or make an enquiry by phone or email, orget in touch to us via our contact form.
Business Hours:
Monday - Friday 8:00 AM - 8:00 PM Saturday and Sunday: Closed
We're your local family owned, operated and licensed crawl space repair and waterproofing company.
919-724-4601
jon@bullcitycrawlspace.com
Services
NATIONWIDE LEADER
Claim you free crawl space consultation today by clicking the button below.
Contact Info
Business Hours:
Mon to Fri: 8:00am - 8:00pm