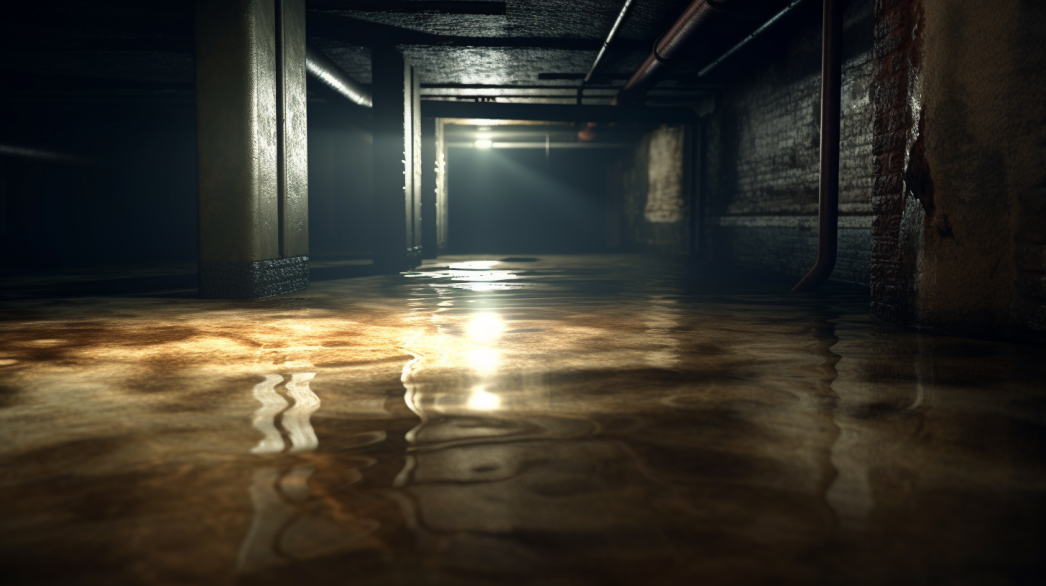
Moisture control is a critical factor in flooring installation and maintenance, as it significantly impacts the longevity, appearance, and performance of the floor. Whether dealing with hardwood, laminate, tile, or carpet, the presence of excess moisture can lead to a host of problems, including warping, buckling, mold growth, and adhesive failure. These issues not only compromise the aesthetic appeal of the flooring but also pose health risks and increase maintenance costs.
Effective moisture control begins with proper assessment and preparation before installation, ensuring that subfloors are dry and suitable for the chosen flooring material. Additionally, using moisture barriers and other protective measures can prevent moisture from seeping into the flooring, safeguarding against potential damage.
In this blog post, we will explore the importance of moisture control in flooring and highlight the potential risks associated with inadequate moisture management. We will also provide practical tips and solutions for preventing moisture-related issues, ensuring that your flooring remains beautiful and functional for years to come. By understanding and implementing effective moisture control strategies, homeowners and builders can enhance the durability and value of their flooring investments.
Understanding Moisture Barriers
Moisture barriers are crucial components in flooring installations, particularly for vinyl flooring, where they provide essential protection against water intrusion. Understanding the function and benefits of moisture barriers can help ensure the longevity and performance of your flooring.
What is a Moisture Barrier?
Definition and Primary Function of a Moisture Barrier
A moisture barrier, also known as a vapor barrier or underlayment, is a material designed to prevent moisture from penetrating the surface it protects. Its primary function is to create an impermeable layer that blocks water vapor and liquid water from seeping through floors, walls, or ceilings, thus protecting the structural integrity and appearance of building materials.
In flooring installations, moisture barriers are placed between the subfloor and the flooring material to prevent moisture from the subfloor or ground from reaching the flooring. This is especially important in areas prone to high humidity or moisture, such as basements, kitchens, and bathrooms.
Common Materials Used for Moisture Barriers
Several materials are commonly used as moisture barriers, each offering specific benefits depending on the application:
- Plastic Sheeting: Typically made of polyethylene, plastic sheeting is a flexible and cost-effective moisture barrier that is easy to install. It is widely used in flooring projects to protect against moisture and vapor intrusion.
- Foam Underlayment: Foam underlayment provides cushioning and noise reduction in addition to moisture protection. It is often used under laminate and vinyl flooring to improve comfort and performance.
- Asphalt Felt: This is a traditional material used as a moisture barrier, especially in older construction. It provides good moisture resistance and is often used in combination with other moisture control measures.
Benefits of Using a Moisture Barrier Under Vinyl Flooring
Protection Against Moisture Damage
Moisture barriers play a vital role in protecting vinyl flooring from moisture-related damage:
- Preventing Swelling and Warping: Vinyl flooring can be susceptible to swelling and warping if exposed to moisture. A moisture barrier prevents water from reaching the vinyl, preserving its shape and appearance.
- Avoiding Adhesive Failure: For glue-down vinyl flooring, moisture can weaken the adhesive bond, leading to lifting and displacement of the flooring. A moisture barrier helps maintain the adhesive's integrity, ensuring a secure installation.
Prevention of Mold and Mildew Growth
Moisture barriers are essential for preventing mold and mildew growth under vinyl flooring:
- Blocking Mold-Prone Conditions: By keeping moisture away from the subfloor and the underside of the flooring, moisture barriers reduce the likelihood of mold and mildew developing, which can cause health issues and unpleasant odors.
- Improving Indoor Air Quality: Mold and mildew release spores that can degrade indoor air quality. A moisture barrier helps maintain a healthier indoor environment by preventing these conditions.
Enhancement of Flooring Durability and Longevity
Using a moisture barrier under vinyl flooring contributes to its durability and longevity:
- Extending Lifespan: By protecting against moisture damage and maintaining the structural integrity of the flooring, moisture barriers help extend the life of vinyl flooring, reducing the need for frequent repairs or replacements.
- Preserving Aesthetic Appeal: Moisture barriers help maintain the appearance of vinyl flooring by preventing moisture-related issues such as discoloration, warping, and bubbling.
In conclusion, moisture barriers are a crucial component of successful vinyl flooring installations. They provide essential protection against moisture damage, prevent mold and mildew growth, and enhance the durability and longevity of the flooring. By understanding the role and benefits of moisture barriers, homeowners and builders can ensure that their flooring investments remain beautiful and functional for years to come.
Preparing for Installation
Proper preparation is crucial for a successful vinyl flooring installation. Ensuring that the subfloor is ready and selecting the right moisture barrier are essential steps to protect against moisture damage and enhance the longevity of the flooring.
Assessing the Subfloor
Importance of a Clean, Dry, and Level Subfloor
A clean, dry, and level subfloor is vital for the effective installation of vinyl flooring. The condition of the subfloor directly impacts the performance and appearance of the flooring, making it essential to address any issues before installation:
- Cleanliness: Before installing vinyl flooring, the subfloor must be free of debris, dust, and adhesive residues. Contaminants on the subfloor can prevent the moisture barrier and flooring from adhering properly, leading to an uneven surface and potential lifting.
- Dryness: Moisture in the subfloor can cause damage to vinyl flooring and compromise the effectiveness of adhesives. Ensuring that the subfloor is completely dry before installation prevents moisture-related issues such as warping and mold growth.
- Level Surface: A level subfloor is crucial for maintaining the integrity and appearance of vinyl flooring. Uneven surfaces can lead to gaps, misalignment, and stress on the flooring material. Use leveling compounds to smooth out any irregularities and ensure a flat surface for installation.
How to Check for Moisture Issues Using Tools Like Moisture Meters
Assessing moisture levels in the subfloor is a critical step to prevent future problems:
- Using a Moisture Meter: A moisture meter is an essential tool for measuring the moisture content of the subfloor. By inserting the meter's probes into the subfloor material, you can obtain accurate readings of moisture levels. Different types of moisture meters are available, including pin-type and pinless meters, which measure moisture through electrical resistance or electromagnetic signals.
- Moisture Content Guidelines: The acceptable moisture content for a subfloor varies depending on the material (e.g., wood, concrete). Ensure that the moisture levels are within the recommended range for the specific type of subfloor and flooring material being used.
- Addressing Moisture Issues: If high moisture levels are detected, address the source of moisture before proceeding with the installation. This may involve improving ventilation, repairing leaks, or using a dehumidifier to reduce humidity levels.
Selecting the Right Moisture Barrier
Types of Moisture Barriers Suitable for Vinyl Flooring
Choosing the right moisture barrier is essential to protect vinyl flooring from moisture-related damage:
- Plastic Sheeting: Polyethylene plastic sheeting is a common moisture barrier used in vinyl flooring installations. It provides a durable and impermeable layer that prevents moisture from seeping through the subfloor.
- Foam Underlayment with Moisture Barrier: Foam underlayment that includes an integrated moisture barrier offers additional benefits, such as cushioning and sound reduction, while protecting against moisture. This type of underlayment is often used for floating vinyl floors.
- Combination Barriers: Some products combine multiple layers, such as a vapor barrier with foam padding, to provide comprehensive protection and enhanced comfort.
Considerations for Choosing the Appropriate Thickness and Material
When selecting a moisture barrier, consider the following factors to ensure optimal performance:
- Subfloor Type: Choose a moisture barrier compatible with the type of subfloor (e.g., concrete, plywood) to ensure proper adhesion and effectiveness.
- Flooring Type: Ensure that the moisture barrier is suitable for the type of vinyl flooring being installed, whether it's glue-down, click-lock, or loose-lay.
- Barrier Thickness: The thickness of the moisture barrier can affect its performance. Thicker barriers may provide better protection against moisture but may also be more challenging to install. Balance thickness with ease of installation and the specific needs of your project.
- Climate Considerations: Consider the local climate and humidity levels when selecting a moisture barrier. In areas with high humidity or frequent temperature fluctuations, a robust moisture barrier is crucial to prevent moisture-related issues.
In conclusion, preparing for vinyl flooring installation involves assessing the subfloor for cleanliness, dryness, and levelness, as well as selecting the right moisture barrier to protect against moisture damage. By following these steps, homeowners and builders can ensure a successful installation that enhances the durability and performance of the flooring.
Tools and Materials Needed
Installing vinyl flooring requires the right tools and materials to ensure a smooth and effective process. Having everything prepared in advance helps prevent delays and ensures a professional-quality installation.
Essential Tools
Utility Knife
A utility knife is an indispensable tool for vinyl flooring installation. It is used to cut vinyl planks or tiles to fit around corners, edges, and other obstacles. A sharp utility knife ensures clean, precise cuts, which are crucial for achieving a professional finish. Make sure to have extra blades on hand, as cutting through vinyl can dull them quickly.
Tape Measure
Accurate measurements are critical to a successful flooring installation. A tape measure helps determine the dimensions of the room and the size of each piece of vinyl that needs to be cut. Use the tape measure to mark cutting lines on the vinyl planks or tiles, ensuring a precise fit and minimizing waste.
Adhesive Tape
Adhesive tape is used to secure the moisture barrier and underlayment in place before installing the vinyl flooring. It helps prevent the materials from shifting during the installation process, ensuring a stable base for the flooring. Choose a tape designed for flooring use, such as double-sided carpet tape, which provides a strong hold without damaging the materials.
Safety Equipment (Gloves, Mask)
Safety equipment is essential for protecting yourself during installation. Wear gloves to prevent cuts and protect your hands from sharp tools and edges. A mask is recommended to avoid inhaling dust and particles that may be generated when cutting vinyl or handling adhesives. Safety goggles may also be useful to protect your eyes from debris.
Required Materials
Moisture Barrier Material
A moisture barrier is crucial for protecting vinyl flooring from moisture-related damage. Choose a moisture barrier material that is compatible with your subfloor type and flooring installation method. Common options include polyethylene plastic sheeting or foam underlayment with an integrated moisture barrier.
- Polyethylene Sheeting: Provides an impermeable layer to prevent moisture from seeping through the subfloor.
- Foam Underlayment with Moisture Barrier: Offers additional benefits, such as cushioning and noise reduction, while protecting against moisture.
Vinyl Flooring
Select the vinyl flooring that suits your design preferences and installation method:
- Glue-Down Vinyl: Requires adhesive for installation and is suitable for areas with high foot traffic.
- Click-Lock Vinyl: Features interlocking edges for a floating floor installation, which is easy to install and remove.
- Loose-Lay Vinyl: Relies on friction and weight to stay in place, making it ideal for temporary or flexible installations.
Consider factors such as durability, water resistance, and aesthetic appeal when choosing your vinyl flooring.
Underlayment (if required)
Underlayment is an additional layer placed between the subfloor and vinyl flooring, providing cushioning, sound reduction, and added insulation. Some vinyl flooring options come with pre-attached underlayment, while others may require separate underlayment for optimal performance.
- Cork Underlayment: Offers excellent sound absorption and thermal insulation.
- Foam Underlayment: Provides cushioning and helps smooth out minor subfloor imperfections.
Ensure that the underlayment is compatible with both the subfloor and the vinyl flooring to avoid issues with installation and performance.
In conclusion, having the right tools and materials is essential for a successful vinyl flooring installation. By preparing in advance and using the appropriate equipment, you can ensure a smooth process and achieve a professional-quality result that enhances the beauty and functionality of your space.
Step-by-Step Installation Guide
Installing vinyl flooring with a moisture barrier requires careful preparation and execution to ensure a durable and visually appealing finish. Follow these step-by-step instructions to achieve a professional-quality installation.
Step 1 - Preparing the Subfloor
Cleaning the Subfloor Thoroughly
Before installation, ensure that the subfloor is clean and free of debris. Sweep and vacuum the area to remove dust, dirt, and any loose particles that could affect the adhesion of the moisture barrier and vinyl flooring. Pay special attention to corners and edges where dirt tends to accumulate. For stubborn residues, use a damp cloth or mild cleaning solution, but ensure the subfloor is completely dry before proceeding to the next step.
Ensuring the Subfloor is Dry and Level
A dry and level subfloor is essential for a successful vinyl flooring installation:
- Dryness: Check for any signs of moisture on the subfloor, as excess moisture can damage the flooring and lead to mold growth. Use a moisture meter to ensure that the moisture levels are within the acceptable range for your specific flooring product.
- Levelness: Inspect the subfloor for uneven areas or imperfections. Use a straightedge or level to identify high or low spots. Apply a leveling compound to smooth out any irregularities, and sand down high spots to create a flat surface. This will prevent gaps, misalignment, and stress on the vinyl flooring.
Step 2 - Installing the Moisture Barrier
Measuring and Cutting the Moisture Barrier to Fit the Room
Measure the dimensions of the room to determine the size and amount of moisture barrier material needed. Cut the moisture barrier to fit the space, allowing for extra material to extend up the walls by a few inches. This extra material can be trimmed after the flooring is installed to ensure a neat finish.
Laying Down the Moisture Barrier Smoothly Without Wrinkles
Unroll the moisture barrier material across the subfloor, ensuring it lies flat and smooth. Begin at one end of the room and work your way across, smoothing out any wrinkles or air bubbles as you go. A flat barrier is essential to prevent any imperfections from transferring to the vinyl flooring.
Overlapping Seams by At Least 6 Inches and Securing with Adhesive Tape
Where seams occur, overlap the moisture barrier material by at least 6 inches to ensure complete coverage and prevent moisture from seeping through. Use adhesive tape specifically designed for flooring to secure the seams and keep them in place. Press the tape firmly to create a watertight seal that will protect the flooring from moisture intrusion.
Step 3 - Installing the Vinyl Flooring
Allowing the Moisture Barrier to Settle Before Proceeding
After the moisture barrier is installed, allow it to settle for a short period. This helps ensure that the barrier is fully adhered to the subfloor and any air pockets are eliminated. Depending on the manufacturer’s recommendations, this settling time may vary.
Laying the Vinyl Flooring According to Manufacturer Instructions
Begin installing the vinyl flooring according to the manufacturer's instructions. Depending on the type of vinyl flooring (e.g., glue-down, click-lock, or loose-lay), follow the specific guidelines for cutting, laying, and securing the planks or tiles.
- Glue-Down Vinyl: Apply adhesive to the subfloor using a notched trowel, working in small sections. Lay the vinyl flooring into the adhesive, pressing down firmly to ensure proper bonding.
- Click-Lock Vinyl: Align the planks or tiles with the edges of the room and click them into place, ensuring a tight fit.
- Loose-Lay Vinyl: Position the vinyl pieces on the subfloor, relying on their weight and friction to hold them in place.
Ensuring a Snug Fit Around Edges and Corners
As you install the vinyl flooring, ensure a snug fit around the edges and corners of the room. Use a utility knife to carefully cut the vinyl to fit around obstacles and along walls. Maintain consistent spacing around the perimeter to allow for expansion and contraction, and use spacers if necessary to achieve even gaps.
In conclusion, following these step-by-step instructions for preparing the subfloor, installing the moisture barrier, and laying the vinyl flooring will help ensure a successful and long-lasting installation. Proper preparation and attention to detail are key to achieving a beautiful, durable floor that enhances the aesthetics and functionality of your space.
Tips and Tricks for a Successful Installation
Installing vinyl flooring with a moisture barrier requires careful attention to detail and adherence to best practices to ensure a durable and visually appealing result. Avoiding common mistakes and following expert recommendations can significantly enhance the quality and longevity of your flooring installation.
Common Mistakes to Avoid
Overlapping Seams Incorrectly
One of the most common mistakes during installation is overlapping seams incorrectly:
- Incorrect Overlap: Failing to overlap seams adequately can leave gaps in the moisture barrier, allowing moisture to penetrate and compromise the flooring. Ensure that each seam overlaps by at least 6 inches to create a continuous barrier that effectively blocks moisture.
- Improper Sealing: Not securing the overlapped seams with adhesive tape can lead to movement and gaps over time. Use high-quality, waterproof tape specifically designed for moisture barriers to seal the seams securely.
Neglecting to Secure the Moisture Barrier Properly
Ensuring that the moisture barrier is properly secured is crucial for its effectiveness:
- Wrinkles and Air Pockets: Neglecting to smooth out wrinkles and air pockets during installation can lead to uneven flooring and compromised moisture protection. Take the time to lay the barrier flat and smooth, eliminating any imperfections as you go.
- Loose Edges: Allowing edges to remain loose can lead to movement and exposure. Secure all edges of the moisture barrier with adhesive tape to keep it firmly in place throughout the installation process.
Ignoring Moisture Issues in the Subfloor
Addressing moisture issues in the subfloor is essential before installing the moisture barrier and vinyl flooring:
- Unchecked Moisture Levels: Failing to measure and address moisture levels in the subfloor can lead to problems such as mold growth and warping of the flooring. Use a moisture meter to check the subfloor’s moisture content and ensure it is within acceptable levels before proceeding.
- Overlooking Repairs: Ignoring signs of damage or irregularities in the subfloor can result in an uneven installation. Repair any cracks, holes, or uneven areas to create a stable and level foundation for the flooring.
Best Practices
Double-Checking Measurements Before Cutting
Accurate measurements are key to a successful installation:
- Precise Cuts: Double-check all measurements before cutting the moisture barrier and vinyl flooring to ensure a precise fit. Mistakes can lead to gaps, waste, and compromised performance.
- Room Dimensions: Measure the entire room, including any nooks or irregular areas, to ensure that all materials are cut to the correct size and shape.
Using High-Quality Materials for Both the Moisture Barrier and Flooring
Investing in high-quality materials can significantly enhance the performance and durability of your flooring installation:
- Moisture Barrier: Choose a moisture barrier that is compatible with your subfloor and vinyl flooring type. High-quality barriers provide better protection against moisture and help extend the life of your flooring.
- Vinyl Flooring: Select durable, high-quality vinyl flooring that suits your aesthetic and functional needs. Quality flooring materials are more resistant to wear and tear, ensuring a long-lasting and attractive finish.
Following Manufacturer Recommendations for Both the Moisture Barrier and Vinyl Flooring
Adhering to manufacturer guidelines ensures optimal performance and warranty protection:
- Installation Instructions: Follow the manufacturer’s instructions for both the moisture barrier and vinyl flooring to ensure proper installation. This includes guidance on placement, adhesive use, and expansion gaps.
- Product Compatibility: Ensure that the moisture barrier and vinyl flooring are compatible with each other and with the subfloor. Manufacturers often provide specific recommendations for pairing their products with other materials.
In conclusion, by avoiding common mistakes and adhering to best practices, you can achieve a successful and durable vinyl flooring installation. Proper preparation, attention to detail, and the use of high-quality materials are key to ensuring that your flooring project enhances the beauty and functionality of your space for years to come.
FAQs
-
Why is a moisture barrier needed?
A moisture barrier prevents water vapor from seeping through the subfloor and damaging the vinyl flooring. It protects against mold, mildew, and structural issues, ensuring the longevity and performance of the flooring.
-
Which moisture barrier is best for vinyl?
The best moisture barrier for vinyl flooring is typically polyethylene plastic sheeting or foam underlayment with an integrated moisture barrier. These options offer excellent protection against moisture while providing cushioning and noise reduction.
-
How do I install the barrier?
To install a moisture barrier, lay it flat across the clean, dry, and level subfloor. Overlap the seams by at least 6 inches and secure them with adhesive tape. Ensure the barrier is free of wrinkles and air pockets.
-
Can I install it on a concrete floor?
Yes, installing a moisture barrier on a concrete floor is essential to prevent moisture from wicking up into the vinyl flooring. Concrete subfloors are prone to moisture issues, making a moisture barrier crucial for protection.
-
What are common installation mistakes?
Common mistakes include not overlapping seams properly, failing to secure the barrier with tape, and ignoring moisture issues in the subfloor. Ensure correct installation techniques and address any underlying moisture problems before proceeding.
Contact Bull City Crawlspace Today!
Bull City Crawlspace will do everything we can to ensure your experience with us is excellent.
Request A FREE Estimate
Request a Free Estimate Form
We will get back to you as soon as possible.
Please try again later.
Checkout Recent Post


Got a Question? We’re Here to Help.
You can arrange an appointment or make an enquiry by phone or email, orget in touch to us via our contact form.
Business Hours:
Monday - Friday 8:00 AM - 8:00 PM Saturday and Sunday: Closed
We're your local family owned, operated and licensed crawl space repair and waterproofing company.
919-724-4601
jon@bullcitycrawlspace.com
Services
NATIONWIDE LEADER
Claim you free crawl space consultation today by clicking the button below.
Contact Info
Business Hours:
Mon to Fri: 8:00am - 8:00pm
All Rights Reserved | Bull City Crawlspace

